Table of Contents
ArmA 2 Weapon Animation Tutorial
ArmA 2 Forum, ArmA 2 Home, ArmA 2 Config, ArmA 2 File Formats, ArmA 2 Missions, ArmA 2 3D Modeling, ArmA 2 Scripting, ArmA 2 Terrain, ArmA 2 Texturing, ArmA 2 Tools
Weapon Animation Tutorial by b00ce
Requirements:
- A weapon model that you made.
- The BISkeleton
- A basic understanding of Oxygen
Step 1
Make a copy of the BISkeleton model and place it somewhere in your addon dir in your P: drive as *Weapon*_anim.p3d, for this example I saved my animation in “P:\m41a_Pulse_Rifle\data\Animbase\PulseRifle_an im.p3d”. This serves two purposes; first, it prevents you from accidentally overwriting your original and second allows you to save and then easily tweak the animation at a later time.
Step 2
Open the copy of the BISkeleton you saved in your addon dir with O2 and create two new keyframes and name them -0.5000 and 0.0000. Make 0.0000 the active keyframe by double clicking on it. Now is also the time you would paste your weapon model into O2 as well, you will need to rotate it 90 degrees on the Y axis.
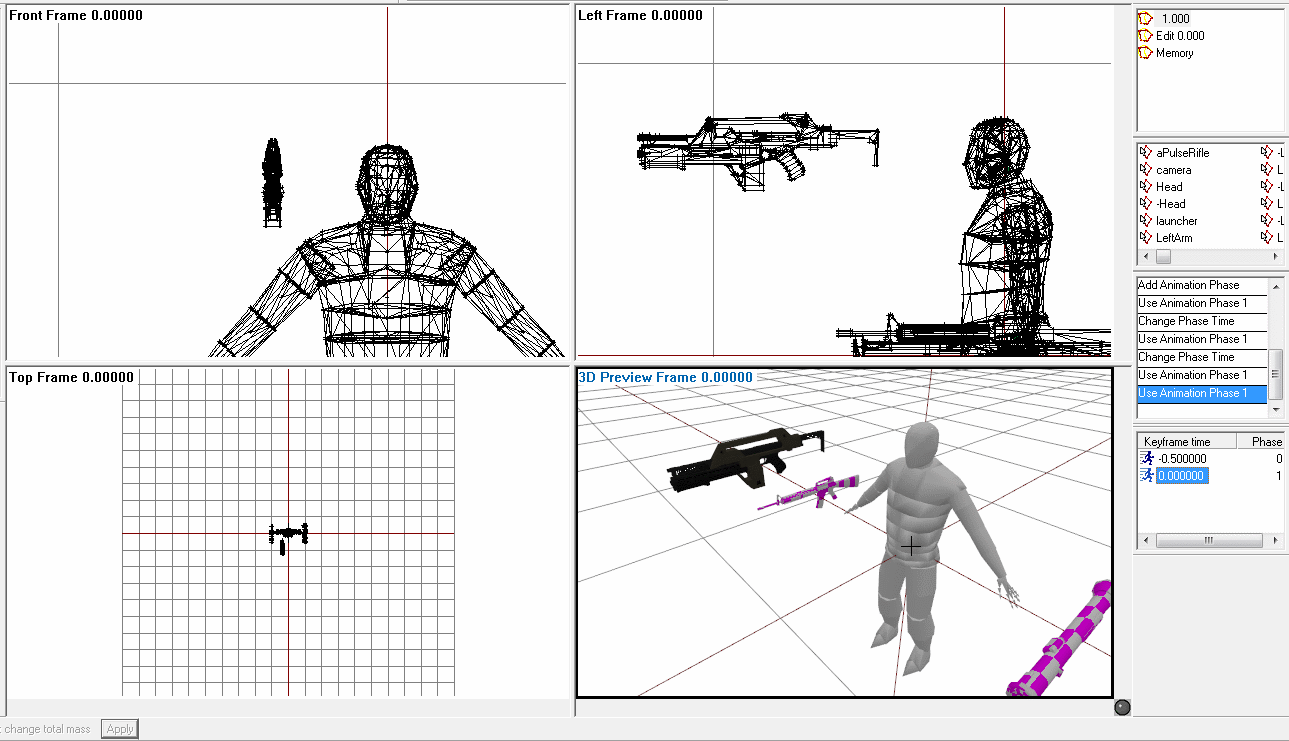
(Note: The position of the weapon does not matter.)
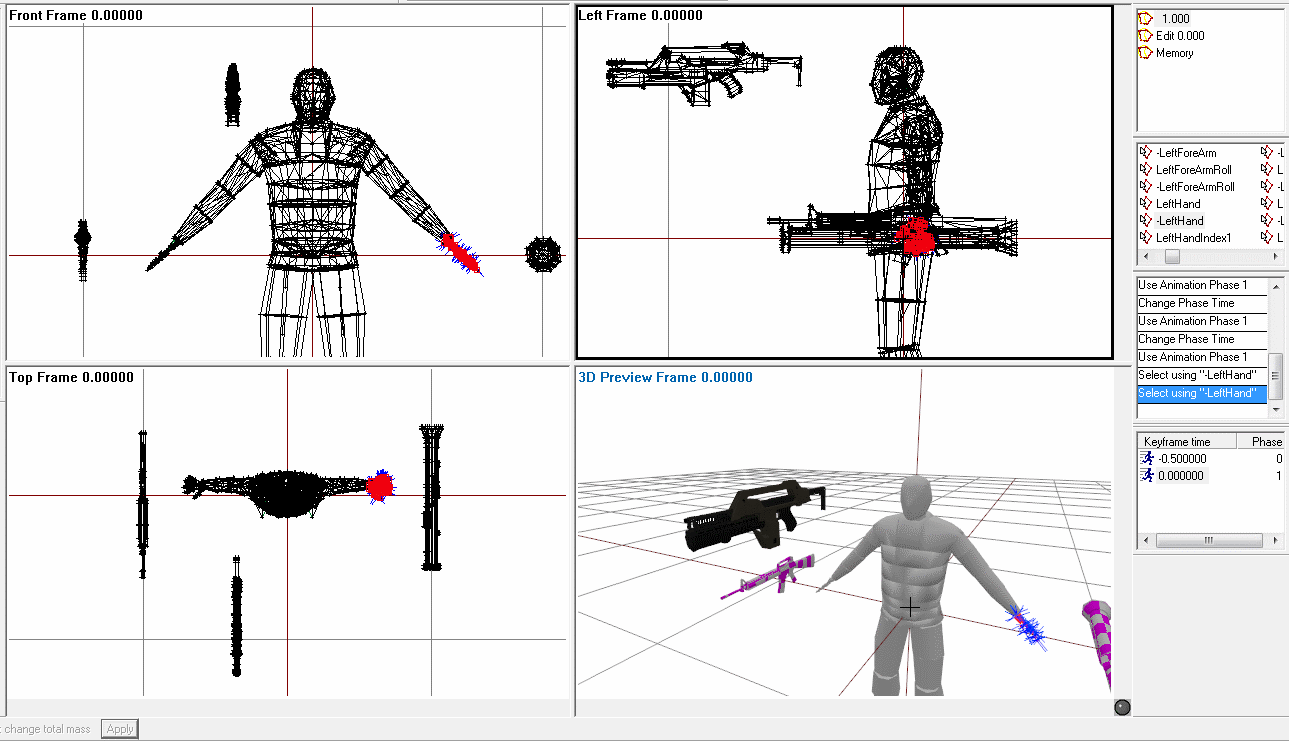
Step 3
Select each hand (Via -LeftHand and -RightHand) and move/rotate them to their respective positions on the weapon. Make a note of which direction the palm is facing. Use the axis locks to make moving and rotating easier.
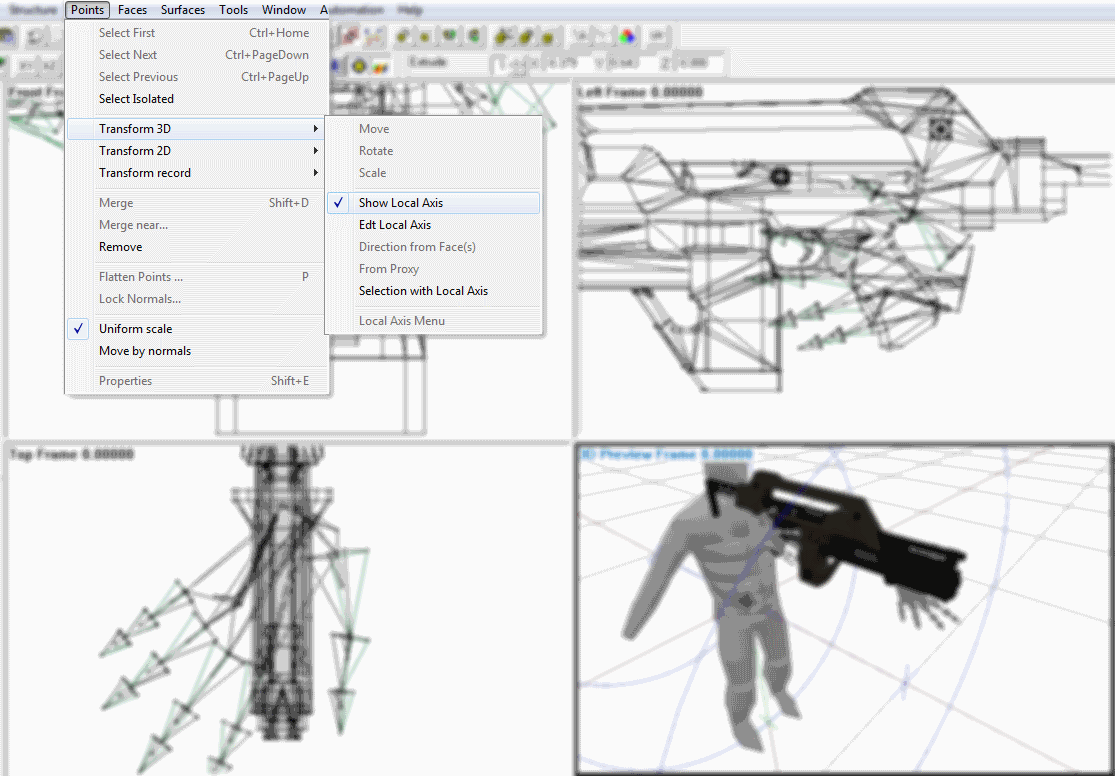
Step 4
Once your hands are in the correct position, you need to turn on “Show Local Axis” (Seen in the image below). This makes the fingers bend where/how they should if you have the axises selected.
- X Axis: Curls the finger joint.
- Y Axis: Rotates the finger joint, this doesn't look natural in most cases.
- Z Axis: Allows you to spread the fingers, use this only on the first joint to get the finger in a natural position.
Form the fingers how you feel they should be (Keep the trigger finger straight, only bend the first joint at most), this takes a lot of tweaking and fine tuning, but I can't tell you how to make custom hand grips, its an art, not a science. But as a piece of advise, it turns out best if you look at your hands while you hold things, preferably something weapon shaped.
Step 5
Move the “weapon” bone (The M16a4 that was already in the Skeleton model) to match where the trigger guard of your gun is. (See below).
Once they're lined up select your gun and delete it, right clicking on the selection box and clicking “Delete Empty”.
Once this is done, with the 0.0000 key frame selected, create a new key frame and name it 1.0000. Save the .p3d then right click on the keyframe window and at the very bottom there is an Export Matracies option, click it and save it in the folder above Animbase. (EX. “P:\m41a_Pulse_Rifle\data\\PulseRifle_anim.rtm
Make sure to include .rtm in the file name or it will not work. A dialogue should now pop up, hit cancel. Your custom hand animation has now been saved, congrats.
Step 6
Get a copy of a model.cfg for character models (One with the bones for people in it.) and paste it in the folder with the .rtm
Step 7
Open your weapon config and add this line to it then save.
handAnim[] = {"OFP2_ManSkeleton", "Path\to\weapon_anim.rtm"};
Step 8
Pack your weapon, make sure to binarize the .pbo. Enjoy.
Notes
This tutorial is written by b00ce, greetings for granting us permission to host it.