Table of Contents
ArmA 3 Real World Location / Place Names
ArmA 3 Forum, ArmA 3, ArmA 3 Config, ArmA 3 Missions, ArmA 3 3D Modeling, ArmA 3 Scripting, ArmA 3 Terrain, ArmA 3 Texturing, ArmA 3 Tools
See also ArmA 3: Terrain config.cpp Class Names.
Class names or location / place names are the labels you see at the in-game map view (M). Terrain without location names is pretty barren as players don't get much orientation reference points.
Note: keypoints are the location names in terrain builder, you cannot import real world shapefile places data as keypoints are done manually in terrain builder.
OpenStreetMap.org Places
Location / place names in openstreetmap.org are in their native language / characters, so for example afghanistan it is all arabic gibberish which we english readers cannot even read let alone understand. You must create your own location names in english.
If you are working with location that has proper english character names then you don't have to do any manual work, just download OSM shapefiles from geofabrik website, which you can load into global mapper.
UTF-8 is important code page for character set, many even english sounding place names have special characters which turn out as “?” in global mapper if you do not use UTF-8. To switch your OSM places layer into UTF-8 just double click the layer to bring up vector options dialog.
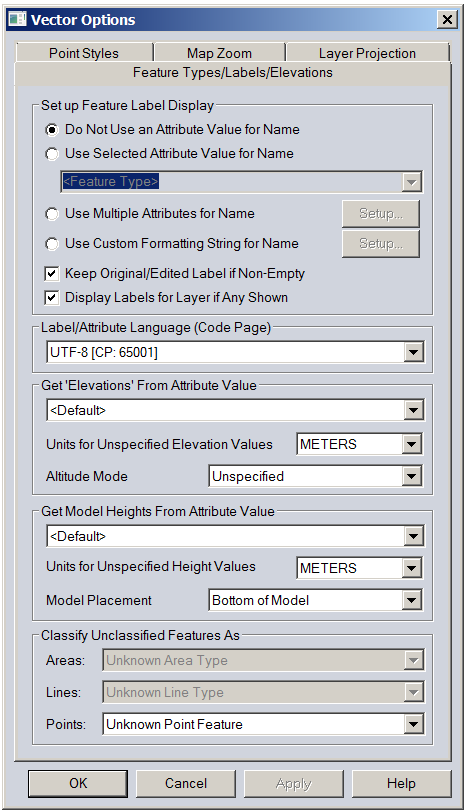
In label/attribute language (code page) dropdown select UTF-8. Then click apply and OK, now your “?” character place names have turned into their proper native characters.
Then you can use road shapefile page to guide you through what to do, except this time you're working with shapefile points instead of road lines.
From QGIS you export CSV file of names instead of roads shapefile, which you load with PMC OSM_Places_CSV2HPP converter (see below) and turn into class names{} config.cpp entry.
Create Names Manually
Create location / place names manually with global mapper.
Do this by opening global mapper with your terrain grid area as user created feature, open world imagery online source, then open Arcgis world imagery with labels in your browser and zoom to that country and your terrain grid area. Look the names from arcgis and type them into global mapper referencing world imagery (in global mapper) for precise position.
Now click the create point / text feature icon (looks like pencil and few dots), then just click on a location you want to mark. Modify feature info dialog comes up, just type the location name into “name:” field.
Next you need to add FCLASS attribute. You can use names like “city”, “village” and “locality” which are proper FCLASS attributes.
Click OK when done.
Now this location appears in user created features layer.
For some reason global mapper v18 seems to crash frequently with this layer setup, so save often. I'm paranoid so usually save after every point created, just to be safe, I have no time to waste doing same stuff twice. Its very easy and quick to save with CTRL-S anyways.
Please consider sharing your created names with rest of the community.
UTM Projection Zone
UTM projection zone is important, if you have wrong zone activated and you are placing vertices for place names, they are in wrong locations when you import them into your correct UTM zone. For example Iraq has UTM 37N and 38N zones, you need to check which one are you placing locations at.
PMC OSM_Places_CSV2HPP Converter
Info / page moved to ArmA 3 Tools: PMC OSM Places CSV 2 HPP.