Table of Contents
Falcon 4 Basic Weathering And Depth
Falcon 4.0 Forum, Falcon 4 Home, Falcon 4 Campaign, Falcon 4 Cockpits, Falcon 4 Database, Falcon 4 File Formats, Falcon 4 SRTM Terrain, Falcon 4 Terrain, Falcon 4 Textures, Falcon 4 Tools
by Zaggy
The Basics
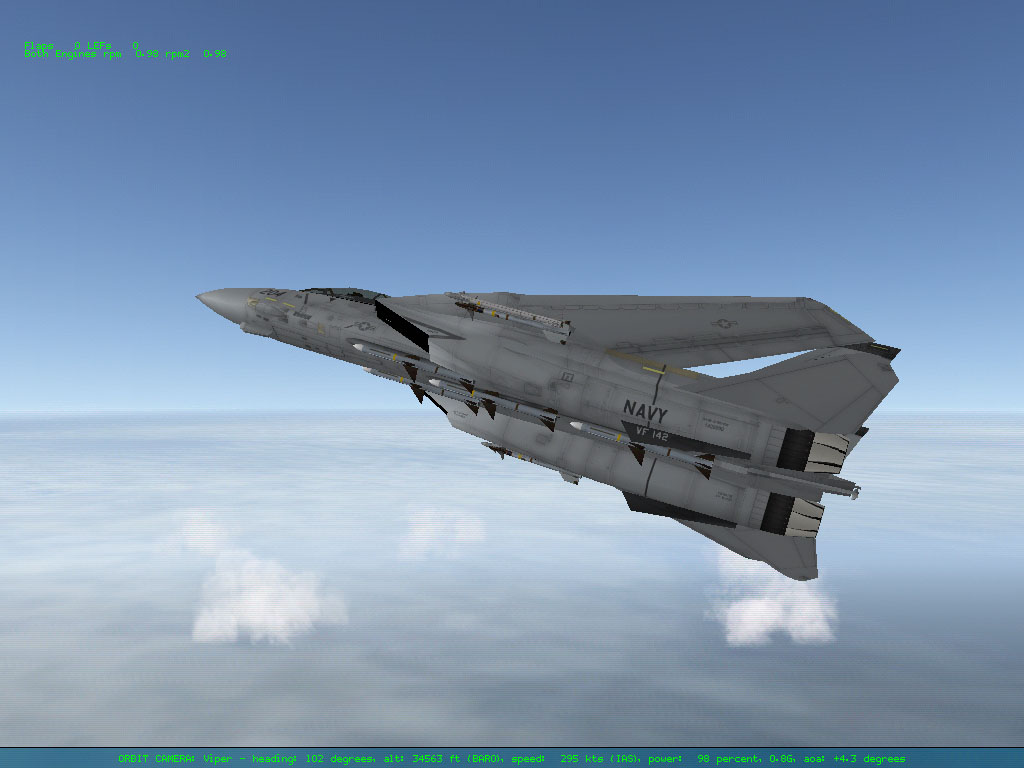
Giving your skin a realistic look requires seeing the 2D skin in front of you, as more like a 3D object, so when it is applied to the model, the result is a look that makes the model look far more detailed and rounded, that would a simply flat colour, wrapped around the model polygons.

That all sounds well and good, but where in our layering should all this stuff go? And then, how do we go about all this?
Well firstly, I'd recommend these weathering layers go above everything else, except the Panel Lines. This done as the dirt and the 'curves' were going to create, occur 'above' things like camo schemes and markings. Dirt and 'curves' dont suddenly stop for Markings or etc, do they (the exception being touch up paint, but of course this falls into our weathering category anyway, so will always appear in the upper layers of your file)?
Shine
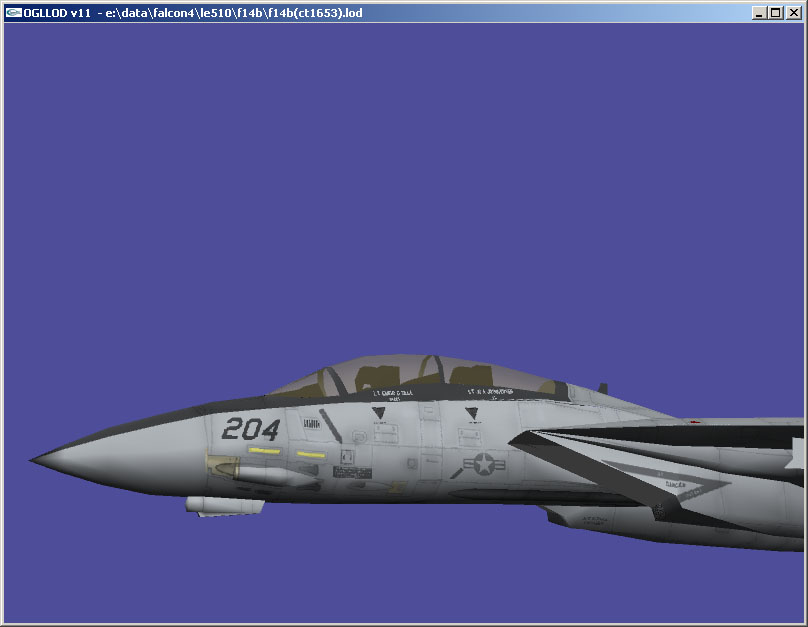
So now onto the how. The first thing i like to create is some basic 'depth' in the texture. Something that will enhance the aircraft's curves. I do this buy using white, sprayed onto a layer, along the area's of the craft that most usually catch the light. What I normally just call some 'Shine'.

For example, down the middle of the wing, from wing-tip to wing-root. The curve of the upper surface of the wing, creates a surface that will more often than not, reflect light. Now, on our skin, we can create some extra depth by also having a section of wing reflecting light. To create this effect, we simply add a new layer to our document, towards the top of the layers, but still under the Panel Lines layer, select an Airbrush (Brush Tool) with a soft edge and a diameter about 1/3rd to 1/2th the width of the wing, then simply spray a line down the span of the wing. Obviously this is WAY too much, so we need to reduce the layers opacity until our white area is almost not noticable. This will typically be about 5-15% Opacity (remember what you set this value too, as to create a consistant look, you will need to use the same value on other area's of the skin, that you use this technique). Whilst it may not look much now, subtle is better. In game later on, the a/c will look better… More curved.
The image shown has had the opacity reduced to 10%. As a general rule tho, the darker the aircraft, the smaller the opacity percentage can be. The extremes being all black and only needing about 2-7% opacity, thru to an all white aircraft (which youd probably clour something like R240 G240 B240, instead of PURE white), which you might need 20-50%. But in general, with the shades of colours we are using, numbers around 10% sould be perfect.
Depth
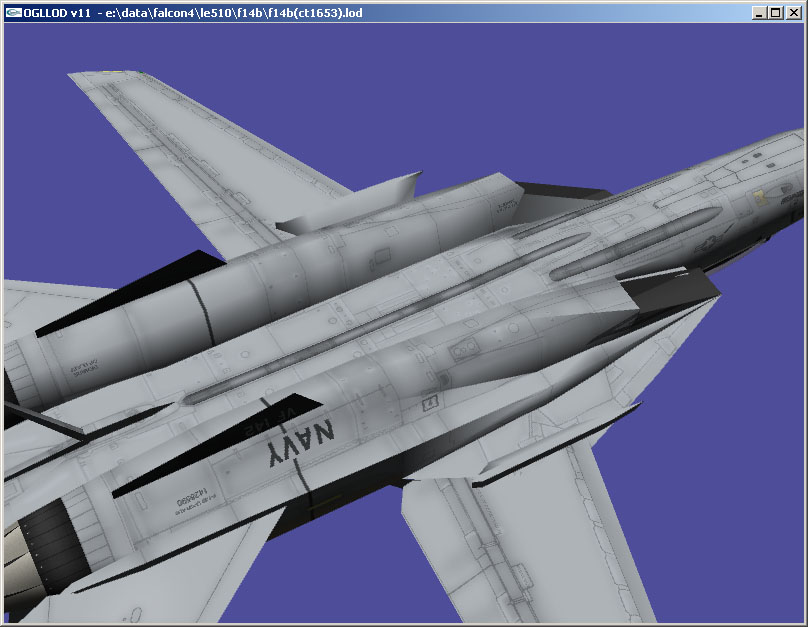
The next step in creating depth is to start to work on individual panels. Typical of high performance a/c or a/c operating in extreme conditions, you'll start to notice, the panels on aircraft are not flat! A lot of metal skinned area's have some degree of visible buckling in them. This natural buckling virtually has no effect on aircraft handling what so ever, but is a very real part of the craft. The buckling can be caused by pressure, heat/cold, G's etc.
We can create an effect that will introduce some very subtle suface distortion as well. This effect is done in TWO layers… One for Dark and one for Light. I normally start with dark. Depending on the number and size of panels, I'll start with a soft edged airbrush about 13-27 pxls in diameter, then pick what angle my 'light source' will come from (For Top panels, i assume the light source is coming from 45deg off front centerline for each side of the a/c; For sides, i'll aussume 45deg above front centerline; and bottom will normally assume the light source is on centerline, from the front).

Now, as were first using a dark colour, I will start to trace round just inside the edges of the panels i wish to highlight, on the edges furthest from the light source (which will result is a bulged out look. you can reverse this if youre after a buckled in look on some panels), for all the areas on the skin.
Once satisfied, i will reduce the opacity of this dark layer, till once again, the effect is ALMOST unnoticable (again typically 5-10%). If the use of such a small sized brush, makes distinct edges in the darker colour visible, even after reducing the opacity, I use the Gaussian Blur filter to soften the spray line further still.
Now, on our second layer, we'll use white, and repeat the above process, except for the fact will will trace just inside the OPPOSITE edges that we used black on. Also again, once complete, opacity will be reduced to a value in the vicinity of 5-10%.
Highlights and Shadows
By now you should be noticing a subtle, yet apparent change in your skin texture. It will look far more Three Dimensional. :) The next step is to start to pick out more obviously raised objects like Cannon Muzzles and Fairings, Stiffeners, Vents, Inlets, etc. This uses exactly the same technique as above (a light and dark layers), except the targetted area's are far more specific, and often reflect light much more obviously (which means our opacity may need to be between 20% and 50%) and the light reflected or shadow will be far more defined (meaning smaller brushes, possibly having top use an eraser tool, to taper the colour to a sharper finish).


In the case of some forms of stiffeners, we may choose ONLY to use the white to highlight them, while in the case of vents or cooling inlets, well shant need any white, and simply use blacks to create the illusion of a deepening vent or inlet.
Stains and Grime
Basic forms of Stains and Grime can also be applied using this method. Again, create a new layer and spray black (or even VERY dark browns) in a fairly hap-hazard manner along areas of typical grime build up and staining (walkways, engine doors, control surface joints, chaff/flare dispensers, cannon muzzle, missile rails etc). Once satisfied, again reduce the opacity and possibly soften using a gaussian blur, until the desired result is obtained.
As you can see, we have used the SAME effect, time and time again, with only slight differences to the colours and the size of the 'brush' used, and created a variety of basic weathering effects. While there are possibly hundreds of other ways to create weathering effects, these basic one's form the basis of many of the other effects you will create and discover.
And now finally, a slight variation of the last effect category, Stain and Grime, that i employ without fail in all my skins, is to copy the panel lines layer, and blur this layer (Gaussian Blur, of 7-20pxl). Obviously altering the opacity to taste and ensuring the layer type is Multiply. In the scheme of things, most often, this is where i start my 'weathering'.
 click for larger.
  click for larger.


But hopefully after reading this, you guys will go away and start to experiment with techniques and find a way that works for you; hopefully improving on these basic techniques, finding new applications for them, and developing new ways of doing stuff… Which then I trust, you'll share with me. :)
This of course does not cover the many other ways of weathering your skins, things like leaking fluids or chipped/worn paint, touch up painting or other stuff, but in an effort to keep things simple and short, ive stuck to the basics first…