Table of Contents
Falcon 4 About DDS Files
Falcon 4.0 Forum, Falcon 4 Home, Falcon 4 Campaign, Falcon 4 Cockpits, Falcon 4 Database, Falcon 4 File Formats, Falcon 4 SRTM Terrain, Falcon 4 Terrain, Falcon 4 Textures, Falcon 4 Tools
Falcon 4 About DDS Files by Zaggy
A brief description of answers to the most common things new skinners want to know about DDS fles, what they are, where they go and how they're made. Should be of use to you out there who are attempting your first skin or mod.
What is a DDS file?
Well to quote Microsoft “The Microsoft DirectDraw Surface (DDS) file format is used to store textures and cubic environment maps, both with and without mipmap levels. This format can store uncompressed and compressed pixel formats, and is the preferred file format for storing DXTn compressed data. This file format is supported by the Microsoft DirectX Texture tool (DXTex Tool), as well as some third party tools, and by the Direct3D extensions (D3DX) library.” Which is all well and good I guess. Simply, DDS is the 'new' way that RV/OF is using to hold textures for all objects in F4.
Why'd They Change From 256 Colour BMP's?
- Well firstly, cos DDS is the native DirectX format, and the format in which these textures are loaded into GPU memory; which means you can save the CPU cycles that were previously used to encode the 256 Colour BMP into the format that DirectX needs to disply the texture on the obejct in game. So in this respect, it improves performance.
- DDS files are NOT limited to a 256 Colour Pallette; meaning we can include more variety of colours in our textures, resulting in a better looking final product - 24Bit colour.
- DDS files are stored already in there compressed format; Substantial disk space savings can be made over a normal 24Bit BMP as well as it takes less time to read the file off the HDD (again resulting in a performance increase).
Where Are These DDS Files Kept?
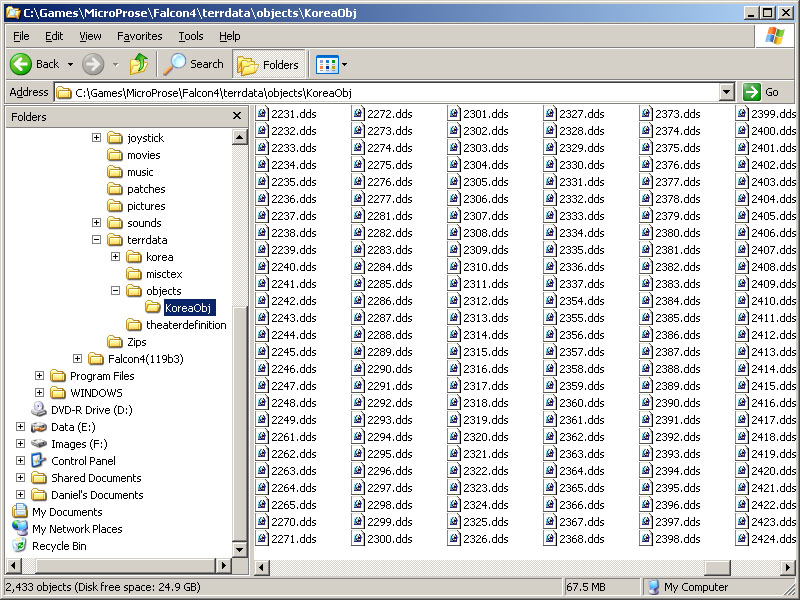
The DDS textures for all objects in F4 are now kept in the ..\MicroProse\Falcon4\terrdata\objects\KoreaObj folder. This approach actually makes it very convienient for the skinner, as all files are readily accessable, and altering a skin simply requires altering that texture file or replacing it with the updated texture file.

There Are Different DDS Formats. What Does RV/OF Use?
RV/OF versions use DXT1(alpha) ARGB DDS file Format. This is commonly referred to as DXT1a. The alpha component is the data that allows us to make things transparent in our textures. For RV/OF, we do not use Mip Mapping, so No Mip Maps need to be saved. Thats about it. DXT1a with NO mip maps.
What Do I Need To Make My DDS Files?
Well you firstly need a 24Bit image, which will of course be our skin, and then you need a DDS Compressor. The two I use are the nVidia Photoshop DDS plug-in and the nVidia command line tool, called NVDXT.
Firstly, the freeware Photoshop DDS plug-in can be downloaded from the nVidia Developer Website. The file, once unzipped (dds.8bi) is copied into the ..\Program Files\Adobe\Photoshop 6.0\Plug-Ins\File Formats folder (though I have found that it works fine even if just copied into the ..\Program Files\Adobe\Photoshop 6.0\Plug-Ins folder), and thats it. Restart Photoshop and in your Open/Save dialogues, you now have the option of using DDS files. When saving, remember the vital information; DXT1a and NO mip maps.
Pro's; we can save DDS textures with transparencies, we can open and save straight to Photoshop. Has a graphical UI as well as a preview option (so we can check our tranparent area's as well as see what compression will do to our skin).
Con's; only usable on software that can support Photoshop type graphics plug-ins. So youre basically restricted to Photoshop. No batch processing, unless you choose to use Photoshop Scripting.
Secondly, the also freeware NVDXT tool, also from the nVidia Developers Website. This is a simple command line tool, that is unzipped and will run from whatever location you copy it to. I am pondering writing a small VB Wrapper for this app at some stage, more for personal convienience, more than anything else. Unless of course someone else wants to write it for me.
Pro's; batch processing, you could process hundreds or thousands of graphic files in one hit, with one command line. Does not restrict the user to a specific bitmap editor, slimmer than the Photoshop Plug-in version.
Con's; does not support a specified alpha colour (ie, you cant say R255 G0 B255 is CLEAR anywhere in the syntax of the most current version - but there are still ways to do create DDS with transparency using TIF format), runs from a command line, requires an additional plug-in or viewer app to view DDS files.
How Do I Make My 24bit Image Into A DDS Skin?
Photoshop DDS Plug-in

First, we need to prepare our image. To do this, you need to flatten your image, in otherwords combine all the layers. You can do this with Layer → Flatten Image. If the resulting single layer is named Background, (this is a reserved name, meaning some functions do not work on it. The following is one of those cases!) simply rename it. In Photoshop 7.0, we just double click on the name in the layers window, and enter our new name or simply use the default name of Layer 0, which is normally what shows up.
Select the Magic Wand tool, set its properties to a Tolerance of 1 and make sure Anti-Aliased is UNCHECKED. Now using that tool, select all the area's of R255 G0 B255 (the Magenta 'Transparent' colour, see the below example of 24bit BMP); you can add to your selected area by holding down the [Shift] key and clicking on the next area. You can also unselect an area by holding down the [Alt] key while you click. Once you have all the Magenta selected, clear it with Edit → Clear, alternatively cut it with Edit → Cut or [Ctrl] + [X]. You should now be able to see Photoshop's Grey/White chequered backgroud, indicating there is nothing present.
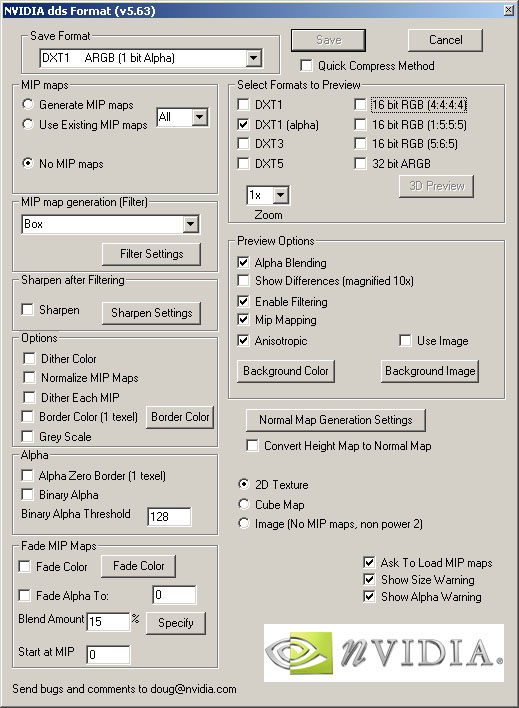
We are now ready to save, File → Save As… , select DDS from the drop down Format box, enter a filename (ideally the texture number) and click [Save]. The DDS dialogue box (see Image) now appears. the Important settings are Save Format = DXT1 ARGB (1 bit Alpha) and MIP maps = No MIP maps. You can choose to preview the texture in a variety of formats also, but pay attention to the DXT1(alpha) preview. The area's formerly of Magenta, should now be BLACK.
If all looks good, click on the [Save] button, and its done!
For textures without transparencies in them, the process is FAR easier. Its simply a case of Flattening the Image, and saving to DDS, using the same settings and outlined above.
NVDXT tool
nvdxt supports MANY different types of Graphics formats (including PSD, but i cant get that to work! BUT if your 'other than Photoshop' bitmap editor, can output TIF's with transparency, then you can make skins with transparencies on it), but the one's were concerned with are 24Bit BMP and TIF with Transparency; its probably easier if you choose one or the other per set of textures.
Flatten all layers and save files as their respective texture numbers (in the case of textures with transparencies, save as TIF, ensure that the area that is to remain transparent, is 'clear', and make sure when you save, you also save Transparency data. DONT ASK ME how to do this with packages other than Photoshop, because I dont know! :) ), and copy them into the same folder as NVDXT (In the example image, I am simply using e:).

Now we need to open a command prompt window (Start → Run → command - See *Basic DOS Console Nav) and navigate to the folder where we have our file saved. Now the syntax we need to create textures compatible with RV/OF is:
nvdxt -file <filename> -nomipmap -dxt1a …in this case
nvdxt -file *.tif -nomipmap -dxt1a
(assuming we saved our files as TIF's… If we saved as BMP's, then replace *.tif with *.bmp)
The NVDXT tool will then process all the TIF's in the current directory, saving each as a DDS file. Then you just need to add a quick readme and zip them up, and theyre ready to be distributed through-out the Falcon 4.0 community. But just remember, test them first! Copy them into the
Basic DOS Directory Nav
dir/w - display current directory contents. Dirs are shown as they are.
cd\ - Go to Root directory
cd <dirname> - Move into the dir <dirname> - example “cd convert” will move the user into the Convert dir
<driveletter>: - Move to drive <driveletter> - example “e:” will move the user to the e: drive