Table of Contents
OFP Brsseb 3D Modeling Tutorial
OFP Forum, OFP Home, OFP File Formats, OFP Tools, OFP Missions, OFP 3D Modeling, OFP Terrain
Operation Flashpoint (OFP) aka ArmA: Cold War Assault (CWA)
Lesson 1: Creating your first addon
Lesson 1: Creating your first addon by Brsseb
Preparing for the lesson
Before we can begin making the addon we should get & set up all the stuff needed. We must create the folder the addon should be in and get all the texture files. We`ll also need a config-file. This can be downloaded from this site. A PBO utilitiy is also needed.
Here is what you need:
- OFP (of course), O2 with Viewer installed.
- Basic understanding of the O2 interface.
- Download Textures & Config File Brrseb_lesson1_start.rar at bottom of this page.
- PBOTool by Ales Mlakar can be downloaded from Operation Flashpoint CZ.
- TexView is a handy tool for viewing PAA and PAC texture files. Not needed to do the tutorial, but you are gonna need it sooner or later…
The textures are all in *.pac format. *.pac & *.paa are the standards used by OFP. The images was originally JPG so I had to use an utility called TexViewer to convert them to *.pac. You don't need to worry about converting textures since they are already in *.pac format.
- Now, go to your drive where bulldozer was installed & create a folder called “crate”. Put the textures and config files in that one.
When you`re done with that, your`re ready to start modeling.
Making the structure
Now start O2 and we will begin creating the crate. Its really simple. If you have had a look at the textures (you`ll need the TexViewer for that since they are all *.pac) you`ll see how the structure should look like. Here`s what you should do:
- Start with a new blank file.
- Click on the “front”-window so there is a black frame around it.
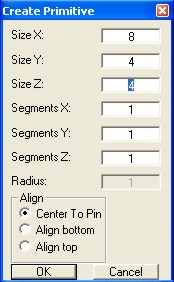
- Press F7 (or “Create→Box…” from the menu) and a dialog should pop up.
- Set the Size X to 8, Size Y & Z to 4. Click OK.
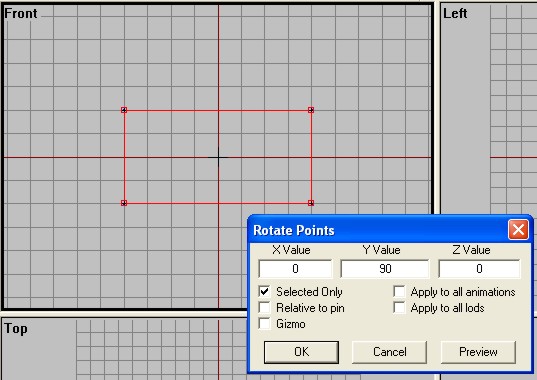
Now you have the basic shape of the crate. But you'll notice that we see the side of the crate in the front view even though it would be more logic to have the front or back of the crate in front view (makes texturing more logic). So lets rotate the crate:
- Make sure it is selected (it should be if you just created the structure, if not press F4 and draw a box around the whole structure to select it (or press CTRL-A).
- Go to “Point→Transform 3d→Rotate..”. A dialog pops up. Enter 90 for the Y value and hit OK.
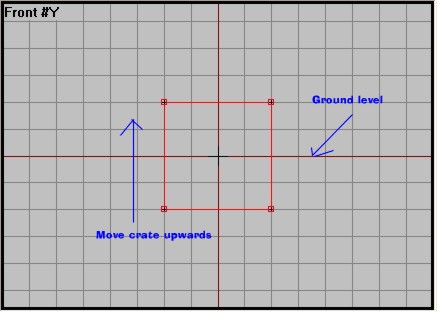
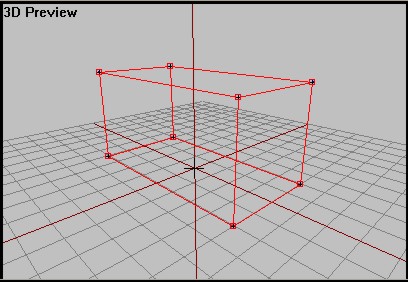
Ok, now have a look at the 3D view. Look at the grid and you`ll notice that the crate`s center is at the Origo. Also that half of the crate is below the grid. This is bad, because on simple objects like this OFP uses the grid as the ground level. So unless we want the crate half-buried into the ground we must move it upwards:
- Go to the front view again, make sure that the structure is selected and view window is active.
- Before we move it we should lock the Y-axis (to allow only movement up and down. Press Y once to do this.
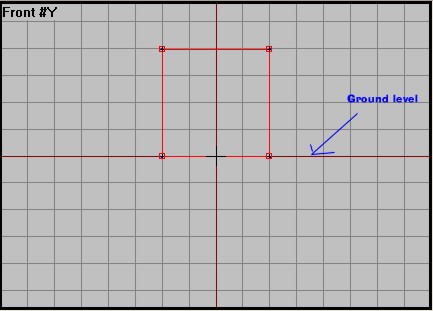
- Now click and hold the right mouse button and drag the crate upwards. Release the mouse button when the crate bottom is at the dark red line (indicating the grid floor). It doesn't have to be exactly at the grid level, but you can zoom in to have a better look ('+' key)
Note: If you can`t see some of the vertices in 3D view, try turning “Face Culling” OFF from the View-menu (or hit the 'F' key).
Now that wasnt so hard now was it? Well, the basic shape is done. In the next lessons we will talk about something called Geometry LOD (Level of detail).
Geometry LOD
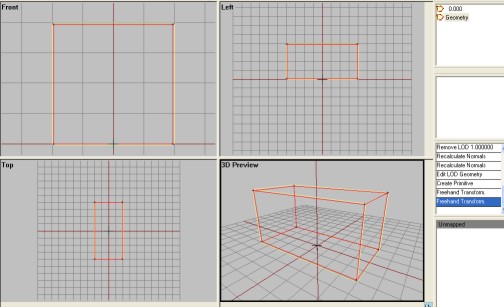
Understanding LOD (Level of Detail) is somewhat hard, so I wont go into detail about what they really are and describe each type and their use. I'm only going to talk about ONE LOD, the Geometry LOD. Basically that LOD is just an invisible structure made out of vertices that tell OFPs physic engine how to deal with your addon. As you probably know a crate is just a long big heavy box. But the engine doesn't know that so we need to tell it. And that is what the Geometry LOD is for. Without that objects like soldiers and tanks could just run trough the crate. Collision detection is not possible without it. So lets make this now, shall we:
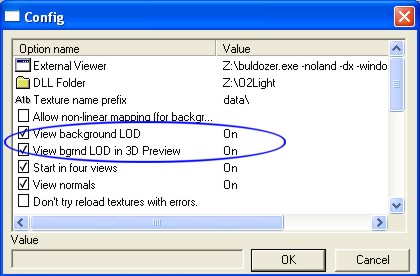
- First make sure that “View background LOD” and “View bgrnd LOD in 3d preview” under “File-Options” is turned on.
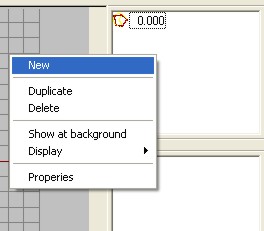
- Find the “LOD window” (usually top right with only one item listed saying “0.000”. If you can`t find it, press Alt+L.) and click your right mouse button. Select “New” and a new entry in the LOD window should appear (called something like “1.000”).
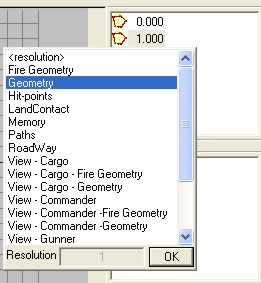
- With the new entry selected, right click again and select “Properties”. Find the one called Geometry from the list and hit OK.
Now you will see that our crate is turned yellow. If you double click the “0.000” LOD you will see that its back to normal. Thats because our crate isn't in the Geometry-LOD but in the “0.000” LOD. But because we turned on “View background LOD” and “View bgrnd LOD in 3d view” under “File-Options” a “ghost” of our crate is being displayed in our new empty LOD, the Geometry LOD. This is useful because we need to now exactly where the original crate structure is during the next few steps. Now double click the “Geometry” LOD and lets continue. We are going to create another crate structure (only this is about 95% its size) so the OFP engine can do proper collision detection on. The reason why we have to make another crate structure for this is that Geometry LOD is invisible & therefore can`t be textured. Now lets get moving:
- In the Front view, hit F7 to bring up the dialog again. But instead of 8,4 & 4 for the x,y & z size, make it 7.9, 3.9 & 3.9.
- Now follow the steps in the last tutorial where we rotated & moved the crate upwards. The new crate should fit just inside the old one. It is important that it doesn't break through the original.
Now OFP know how to deal with collision detection. But it can`t be sure on how heavy the crate is. It it 1000kg or only 1/8 kg. And is the back part of the crate more heavier than the front? Now lets put some Mass to our crate:
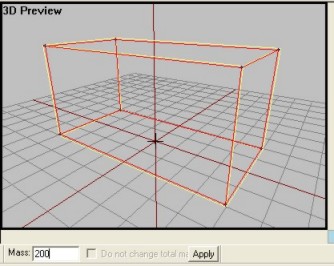
- Find the Apply Mass dialog. If you don't see it, press Alt+M and it should show up beneath the view panels.
- Still in the Geometry LOD, press Select all (CTRL-A) and the field for entering mass should become available.
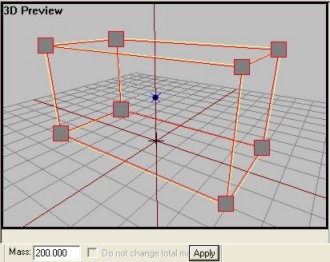
- Enter “200” kg and press “Apply”. Small grey boxes should appear at the structure vertices.
As you probably have guessed, the grey boxes indicate how much weight the vertex has. Since the weight of the whole crate is balanced, all boxes should be the same size. To apply weight to a single vertex, press F4 (vertex select mode), select a vertex and enter value. But that's not for this tutorial.
We also have to save a selection for this LOD to work (I don't know why, but if we don't do this, the Geometry LOD will fail). Do this:
- Press CTRL-A to select the Geometry LOD structure.
- Find the “Named Selections” window below (under Window-menu), click the right mouse button and select “new”. Your selection will then be saved. Call the selection “Component01”.
Now each time you double click on the “Component01” in the selection window the content on the Geometry LOD should be selected. Note that each LOD have their own set of saved selections. Therefore “Component01” will only be on this list when you have already double clicked “Geometry” in the LOD window.
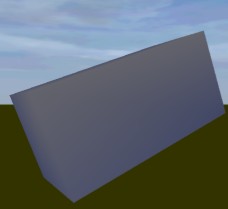
Now the box is nearly finished. But if you have looked in the external viewer, the crate looks very UGLY. But don't worry, in the next tutorial we will put some nice textures to it.
Texturing
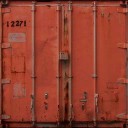
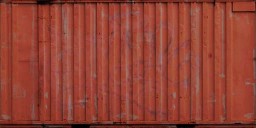
Now lets make our crate look nicer. In your crate-folder there are now two textures, red_side.pac & red_door.pac. Our goal is to apply red_door to the front and back, and red_side to all the other sides.
We will work with one texture at the time. Lets start with the red_door texture:
- Double click the “0.000” LOD and press F4 (vertex select mode).
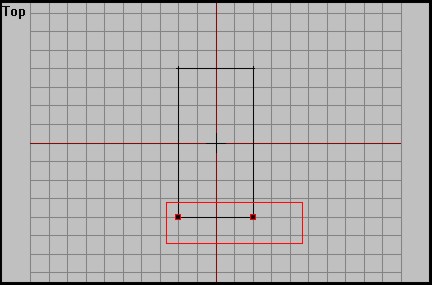
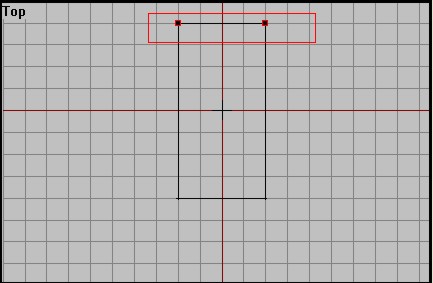
- In the Top view, drag a box around the bottom of the crate. The front face should now be selected.
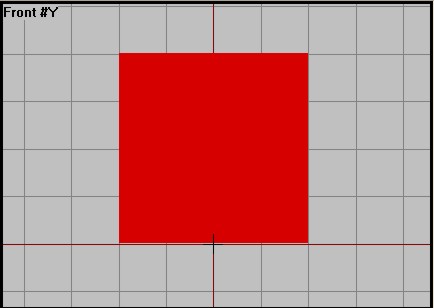
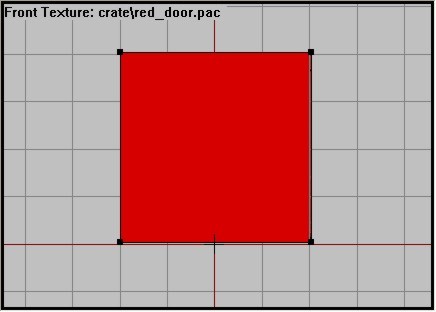
- In the front view (NB: To make a view “Active”, click right mouse button with Alt pressed). Now here is a nice tip: Look at your front view and you see that the 4 vertices of the face are selected. Now, you know that the face is selected, but how do you know if it is the front or back? Are you “facing the face” you have selected? To make sure you are, turn on “Fill solid faces” in the view menu. If the face is filled red, you know you got the right face. If it isn't, you are selected the opposite face. Use this tip to make sure you are in the right view if you are unsure of the orientation of the object. NOTE: I have “Fill solid faces” turned ON in the next pictures.
- Press the 'A' key. to enter texture mode.
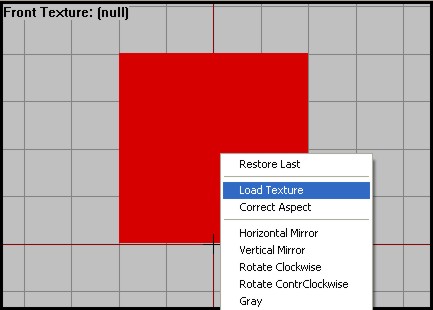
- Now click the right mouse button and “Load texture”. Select the “red_door.pac” from your crate-folder and hit OK.
- Draw a box about the same size as the selected face. Zoom in ('+') to see better. Its not the end of the world if you cant match the crate side precisely. If you hit left mouse button once after dragging, you must start over. If you have dragged it and want to change its position, use the up/down/right/left buttons on the keyboard. Use the same buttons while holding the shift button to change its size.
- When you`re happy, press 'B' to apply the texture to the face. press F2 to return to vertex select mode again. If you have turned “Fill solid faces” in the View menu ON, turn it off to see your texture.
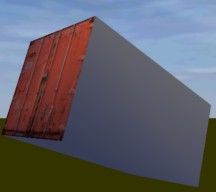
If you have a look at the external viewer, the texture should now be in place. (If you messed it up you`ll have to try again)
Now you must do the same thing to the back of the crate. The red_door texture is to be applied there too. Here is what to do:
- Make front view active and change this view to “back” by selecting “View→Back” from the menu. Remember what I talked about “facing the face”. To apply textures to the other side we must change the camera to “back”
- In the top view, drag a box around the top of the crate. The back face should now be selected.
- Follow the same step as above on how to apply the texture to this side. Check it out in the external viewer to make sure everything looks nice.
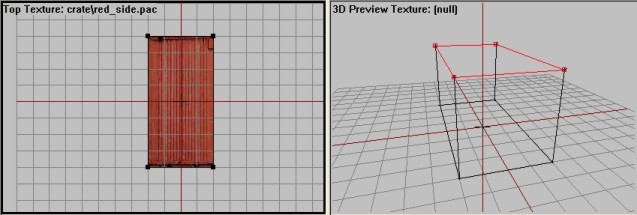
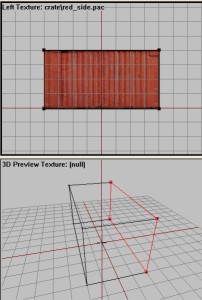
Now if everything went OK, you now have the door-textures applied. Now for the remaining 4 sides; top, bottom, right and left. If you have completed the door-texture, you should be able to apply the side-texture all by yourself. Just remember to load the red_side.pac instead of the door-texture. Select one side of the time and apply the texture. You probably need to change the view panels a little bit to make sure that you are “facing the face” you are working on. Here are some shots from the process:
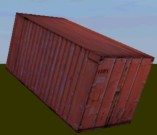
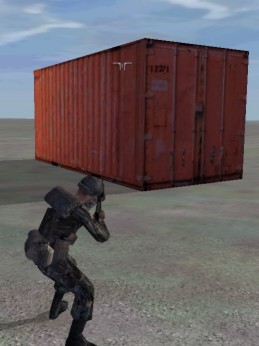
Eventually, the crate should look like this in the external viewer:
One more thing. Sometimes you need to make sure O2 has got the right path to your textures. If they are wrong, your addon will be textureless in-game even though it looks nice in Bulldozer. Most ingame textures that OFP use are found in the data.pbo. But most unofficial addons have their own textures (like ours). So to make sure that your textures paths points to your addon folder (crate) and not somewhere else, do this:
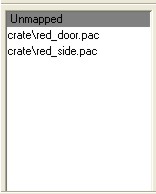
- Find the Texture Library window (Alt+T if you cant find it). It should look like this right now.
- If both textures read “crate\texture_name.pac” (just like in picture above) then everything is fine. But if the path is wrong, like “data\” instead of “crate\”, you must follow the next few points:
- Double click your left mouse button while holding down CTRL on the first texture name. All faces using this texture will be selected.
- Now make a view active (any view) by using Alt+Right mouse button.
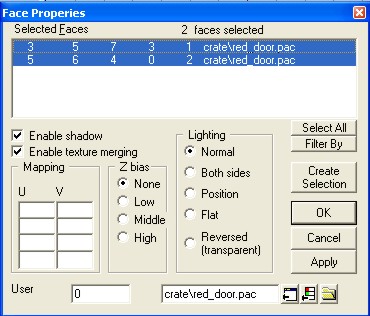
- Press 'E' to bring up this window
- If the bottom edit box read anything other than the path to your crate folder, change it (The picture below shows how it should be. Then hit OK)
- Rembember to do the same thing with the other texture as well if needed.
Done? Almost done now. OK, lets move on…
The Config File
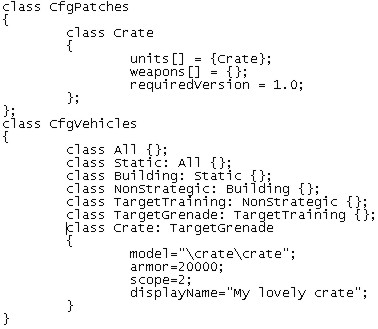
Open your config-file (the one you downloaded together with the textures & that should now be in your crate-folder). It looks like this:
I am not going into detail about config-files. There are other tutorials out there that describes the different elements of a config file. If you happen to know a little Object Oriented Programming (like C++ or Java), you`ll notice that our Crate has been classified as an Static Building of some sort. But here are the most important stuff to us right now:
- model=“\crate\crate” tells OFP where to find the 3d model for the crate. If it cant find the model in the data3d.pbo (where most official 3d models are found), it starts looking in the game`s Addon folder. “\crate\crate” tells OFP that the p3d model file is called “crate” and is found in the “crate”-PBO file (which is also the folder name).
- DisplayName=“My lovely crate” is the name the object will be called when you start looking for it in the Empty→Objects-list in the OFP Mission Editor. You can change that to anything you like (but make sure that name isnt used by another addon).
So, nothing for you to do here though. I just wanted to show you the config file.
Now lets get your addon in the game!
Finishing our addon
Its almost time to test our addon in OFP. We have just a few steps left.
- Have a look at your crate-folder. It should contain crate.p3d, the two textures and your config file.
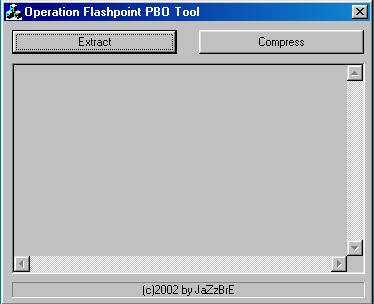
- Now run the PBO Tool you downloaded at the beginning of the tutorial.
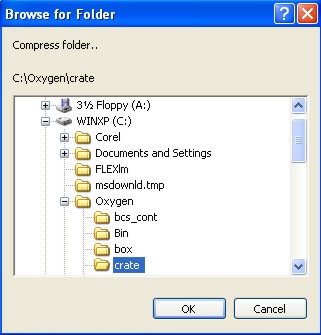
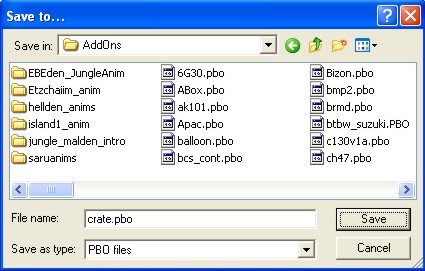
- Select “Compress”, select your folder and hit OK. Then type crate.pbo at the save dialog that pops up and save it in your OFP addon folder.
NOTE: For the PBO tool to save the file, you MUST enter the .pbo extension after your filename in the save dialog!
Now fire up Operation Flashpoint, start the editor and have a look at your new addon!! Try to run through it to check if the collision detection works. And if you get no error messages and the program doesn't crash, be PROUD! You just completed your first addon for OFP!
Download the completed version Brsseb_lesson1_done.rar OFP.Brsseb_Lesson/ Torrent Magnet from below:
magnet:?xt=urn:btih:40aac3407210ddb8ffcee06cdb009c0b099ccdce&xt=urn:btmh:122046986f756bcebf9744dc9f81bc3fc736a54e164113ec62e18c827a4a06271364&dn=OFP.Brsseb_Lesson&tr=udp%3a%2f%2ftracker.opentrackr.org%3a1337%2fannounce&tr=udp%3a%2f%2ftracker.openbittorrent.com%3a6969%2fannounce
Any questions/bug reports goes here: brsseb@hotmail.com
Notes
This tutorial was written by Brsseb in ofp.gamepark.cz/_hosted/brsseb/, it was posted here with his permissions, thank you Brsseb!

