Falcon 4 DDS Skin Tutorial
Falcon 4.0 Forum, Falcon 4 Home, Falcon 4 Campaign, Falcon 4 Cockpits, Falcon 4 Database, Falcon 4 File Formats, Falcon 4 SRTM Terrain, Falcon 4 Terrain, Falcon 4 Textures, Falcon 4 Tools
Falcon 4 DDS Skin Tutorial
by JanHas
There are more ways to create a good dds skin file. Here's how I do it.
There are a lot of drawing programs. I use two: iPhoto Plus 4 (program from 1991) and Adobe Photoshop Elements. I created most of the skins with iPhoto Plus 4. An Simple and effective drawing program.
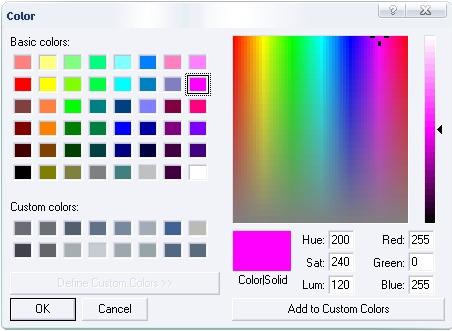
Sometimes an area needs to be transparent. Before the arrival of the DDS format we used the color magenta. See the following picture for the right numbers for the color magenta. Magenta is Red 255, Green 0, Blue 255.
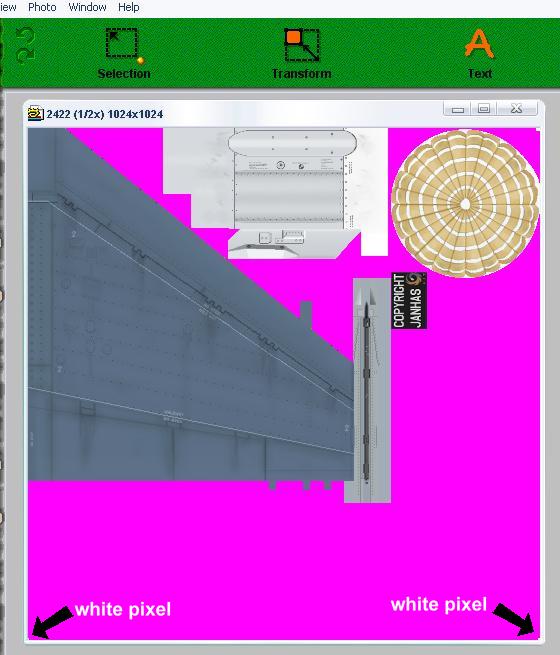
In the next example everything magenta will become transparent (not shown in the sim).
Notice
Make a every corner of the skin NOT used for the skin in the sim white. One pixel is enough. I?ll explain later where this is good for.
Notice
Once you are ready skinning you save it in (24 bit) bmp format.
Converting - bmp into dds - The Elephant Way
Now we have two programs we can use to convert the bmp format into dds format skin. Tool 1 is Elephants bmp to dds converter. This is an simple drag and drop utility I used for quite a while.
You can get it here.
Positive side: it's fast and simple to use.
Negative side: sometimes the quality of the output dds file is not that good. Colors change a bit to Red/Green/Blue.
If you wish to have a better quality of skin you can try this way.
Converting - bmp into dds 2 - The Photoshop Way
The second program you can use is Adobe PhotoShop. The standard program is not compatible with the dds file format, but Nvidia has made an Adobe PhotoShop Plug-in to make it compatible. Here's the link to the website.
A program I recommend is the “Windows Texture Viewer” for viewing the dds files. Here's the link.
Here's the link to the exe file containing the Adobe PhotoShop Plug-ins.
The “dds plugin file” only can be found here.
Just make sure that the dds.8bi is in the \Program Files\Adobe\Photoshop Elements 2\Plug-Ins\File Formats directory.
You might need the ntdll.dll file to make it work. That file should be placed in the \Windows\system32\ folder. You can get the ntdll.dll file here.
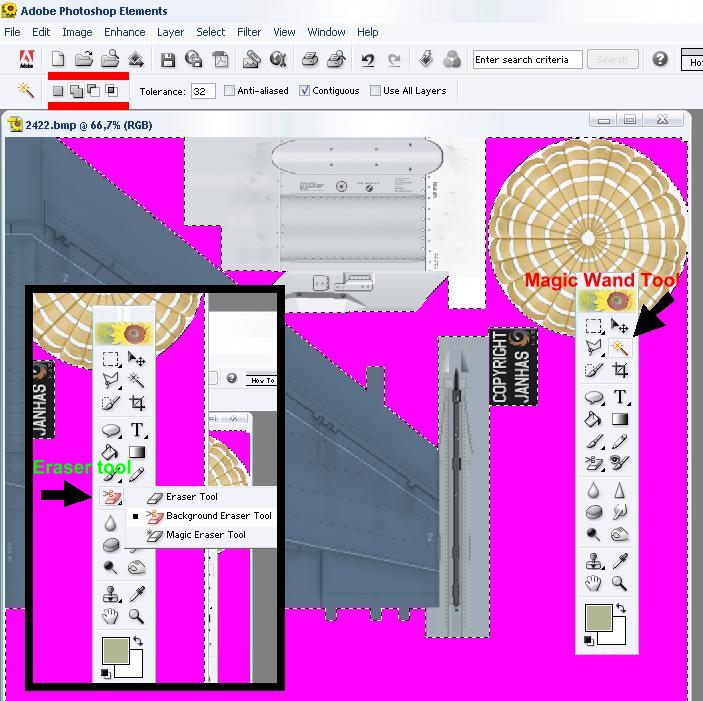
Now you open PhotoShop and open the skin file. What I do is select and remove the magenta section with the background remover. Here's how it looks.
Use (on the right) the Magic Wand Tool and select the magenta color.
Notice: the edges also have an darker or lighter magenta color because of file saving. Select them also.
Use the additional options (between the two red lines. First one: select one area. Second: Add area's to the selection. Third: De-select an area from the selection. Fourth: Intersect with selection. I use only the first three) aviable to make selection easier.
After you have selected all of the area you need to erase selected area by using the Background Eraser Tool (right clicking on the eraser tool). Erase a little part and then hitting the “delete key” on the keyboard will erase the rest of the background.
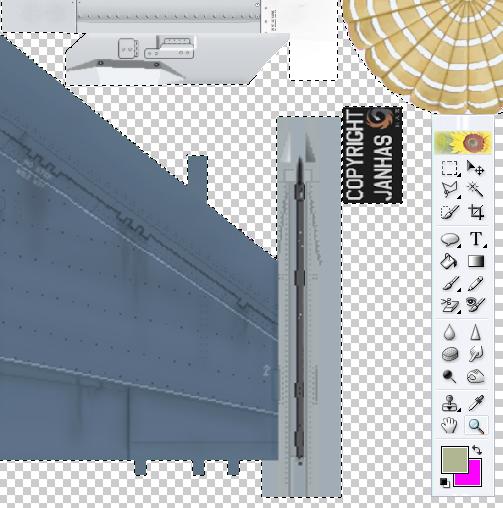
You'll now have this
Now select the entire skin (CTRL-A). This is also the moment to resize the skin if needed. If you do that, make sure that - after resizing - you select the skin again.
Copy the skin. (Save if you feel the need (it will become an psd format)).
Now create a New (picture) (CTRL-N).
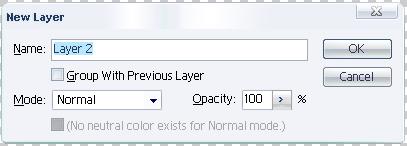
Then add a second layer (100% opacity). Naming the file is not needed.
Now paste (CTRL-V) the skin file.
Notice
Here do the white corners become handy. For example; when you have erased near the bottom of the skin the entire area, the pasted skin will be centered in the new file. With the white pixels in the empty corners, shifting to the center will not happen.
Now you have an new file with two layers: the background layer (1) (also no fill) and the skin layer (2).
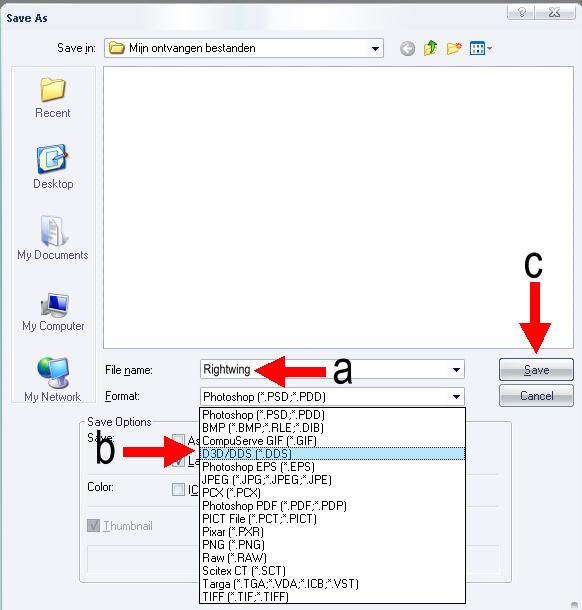
Now it's time to save (CTRL-S).
- Give your skin the appropriate name
- Select the dds format
- Save
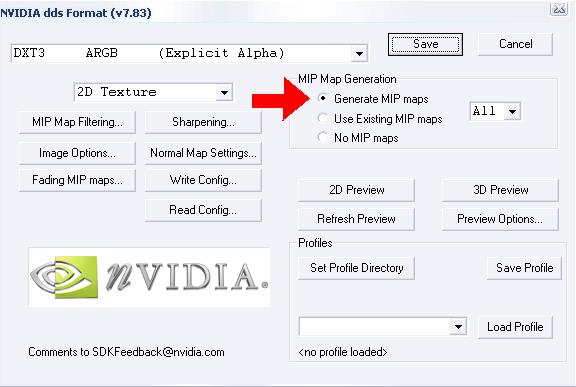
Now you enter the dds saving options menu.
Select the Generate MIP maps option.
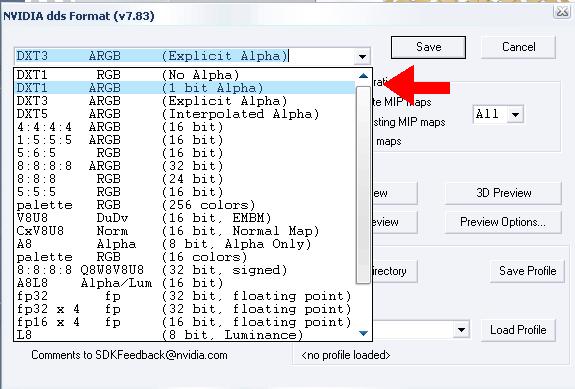
Next you have to select the output quality of the dds file. I normaly use the DXT1 with alpha option. That'll keep it nice and not to large. Remember DXT1 no alpha is low quality and DXT5 which is high quality but makes the skinfile large. Larger means more videocard memory use and more rendering time. (For my cloud skin files I used DXT5).
Now press “Save” and the skinfile is ready for use. Congratulations!

