Table of Contents
ArmA 3 Satellite Texture to Mask
ArmA 3 Forum, ArmA 3, ArmA 3 Config, ArmA 3 Missions, ArmA 3 3D Modeling, ArmA 3 Scripting, ArmA 3 Terrain, ArmA 3 Texturing, ArmA 3 Tools
Satellite Texture to Mask Tutorial by Opteryx
This is a basic way of turning your satellite texture into a simple mask with Photoshop. It will not make a perfect mask, but something basic to work off of.
Load Satellite Texture
Adjust Hue / Saturation
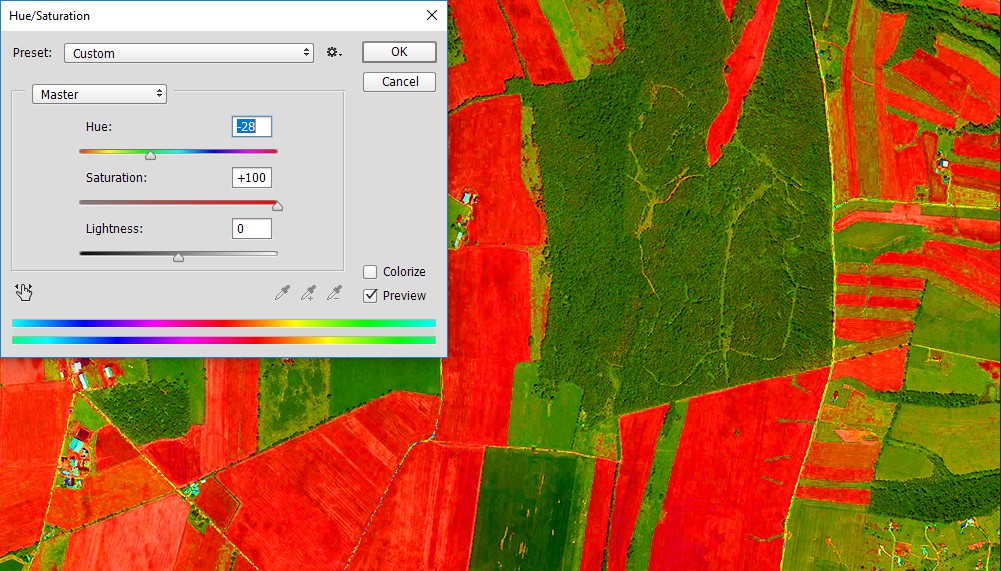
Go to Image > Adjustments > Hue/Saturation, now turn the saturation to 100 and adjust the hue depending on your result in the next step, this something you'll probably have to go back and forth with to get good results. The idea is to make each surface type stand out as much as possible.
You might also use the replace color tool here to separate the surface colors more. It can be found in Image > Adjustments > Replace Color.
Adjust Brightness / Contrast
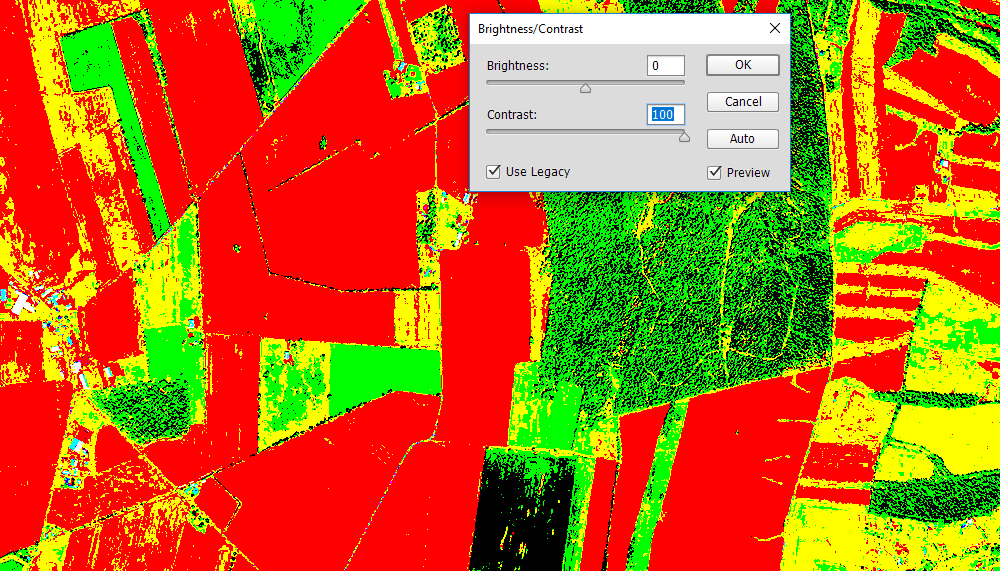
Now go to Image > Adjustments > Brightness/Contrast and check the Use Legacy box, the turn the contrast slider to 100.
This will turn all the colors on your map into 8 colors and these are:
White RGB: 255,255,255
Black RGB: 000,000,000
Yellow RGB: 255,255,000
Red RGB: 255,000,000
Green RGB: 000,255,000
Blue RGB: 000,000,255
Cyan RGB: 000, 255, 255
Magenta RGB: 255, 000, 255
These RGB values are important as they determine the surface type in your Layers.cfg
Replace Color
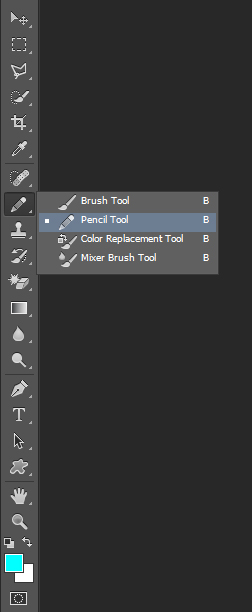
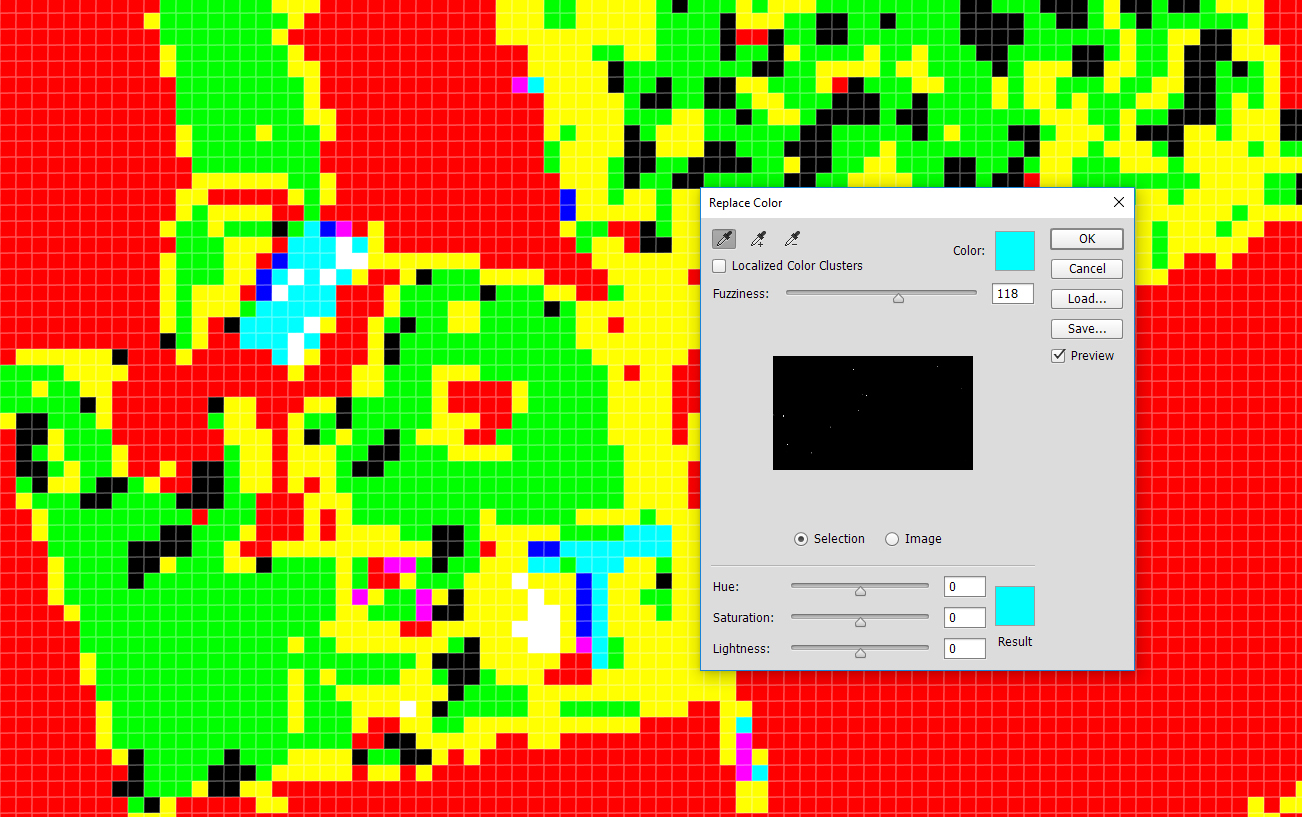
This may vary depending of what your original Sat looks like, but colors like red, yellow, black, white and green tend to be dominant. You will probably have stray pixels of blue, magenta and cyan that might be hard to find. To remove these, Use the pencil tool.
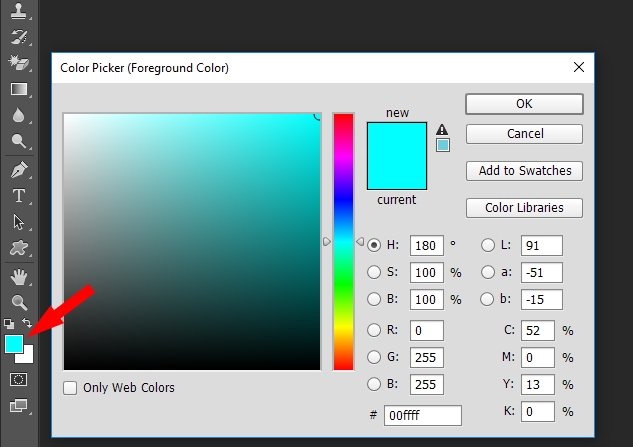
Then go to the color picker's foreground color.
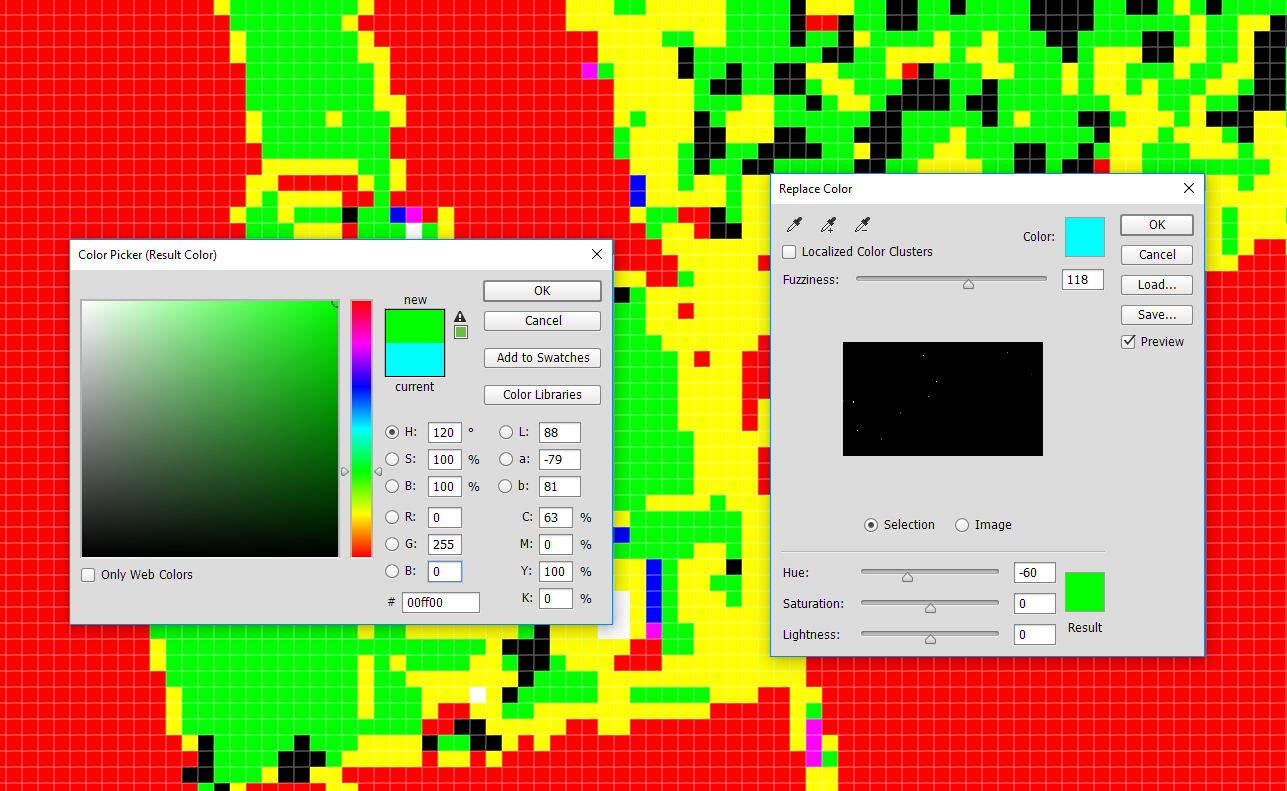
Select the color you want to remove (for example cyan), place a pixel on the sat, go to the Replace Color tool again and select that pixel.
Now go to the Result box and the bottom right and enter the RGB value of the color you want to replace it with.
Now you should have a somewhat useful mask for your terrain. It's also important to note that this is something you'd probably want to do after you've cleaned up nasty artifacts in your sat like shadows etc.

