Table of Contents
ArmA 3 Making Roads In Terrain Builder
ArmA 3 Forum, ArmA 3, ArmA 3 Config, ArmA 3 Missions, ArmA 3 3D Modeling, ArmA 3 Scripting, ArmA 3 Terrain, ArmA 3 Texturing, ArmA 3 Tools
ArmA 3 Making Roads In Terrain Builder by granQ
Part 1: Terrain Builder
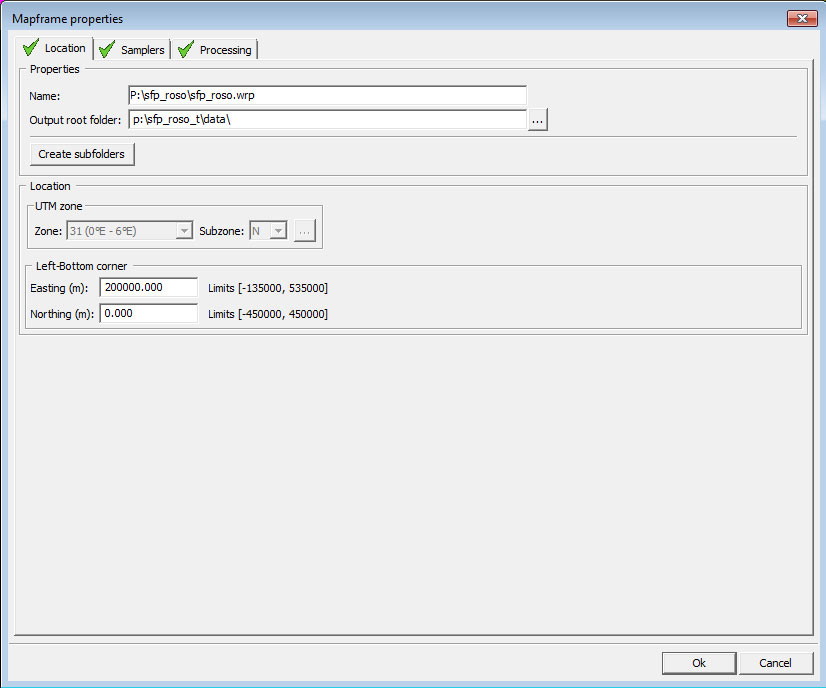
First step is to check our map frame properties. It's important that the location is the same as the following:
Zone: 31
East: 200000.000
North: 0
No matter where your island is located, it needs to have these values. Don't worry about sun position and similar as that is controlled by the config.
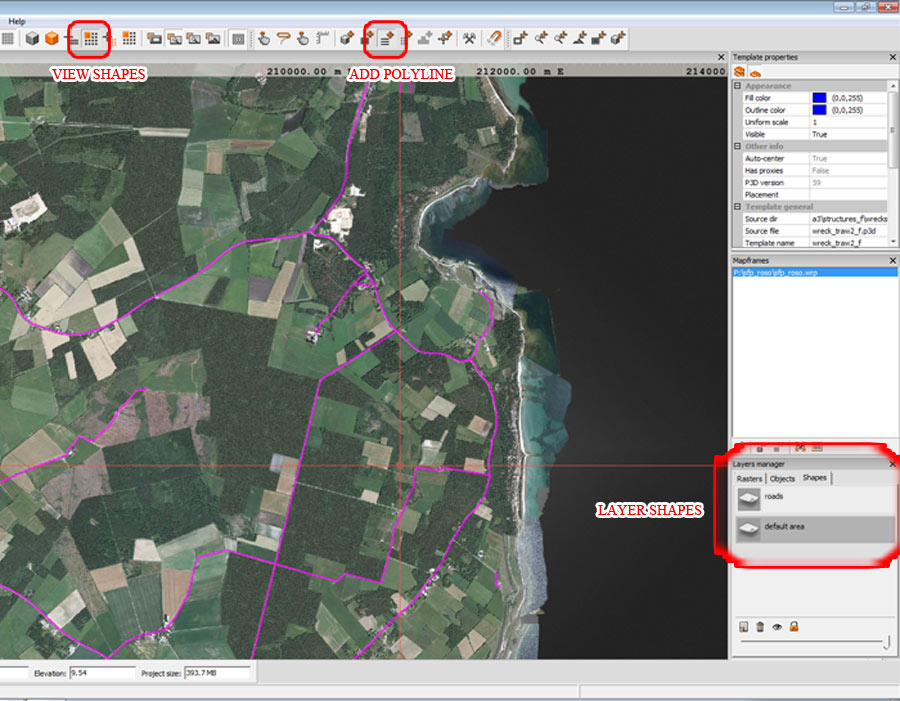
Now lets identify the tools we need.
View Shapes = Lets you see the roads we make, should be pressed down.
Layers shape = Go into the layers manager, select shapes and then add a new layer called roads
Add polyline = This tool we can click on the map to make our roads.
Now we are ready, I will not import my roads from some database but “paint them” myself as my island is fictional. Personally I load up the satellite and start tracing.
Left click at your starting point and then click once as “waypoints” while you follow the road. End it with a double click.
Once you are done (or perhaps just do 3-4 roads to continue this tutorial and see it works)..
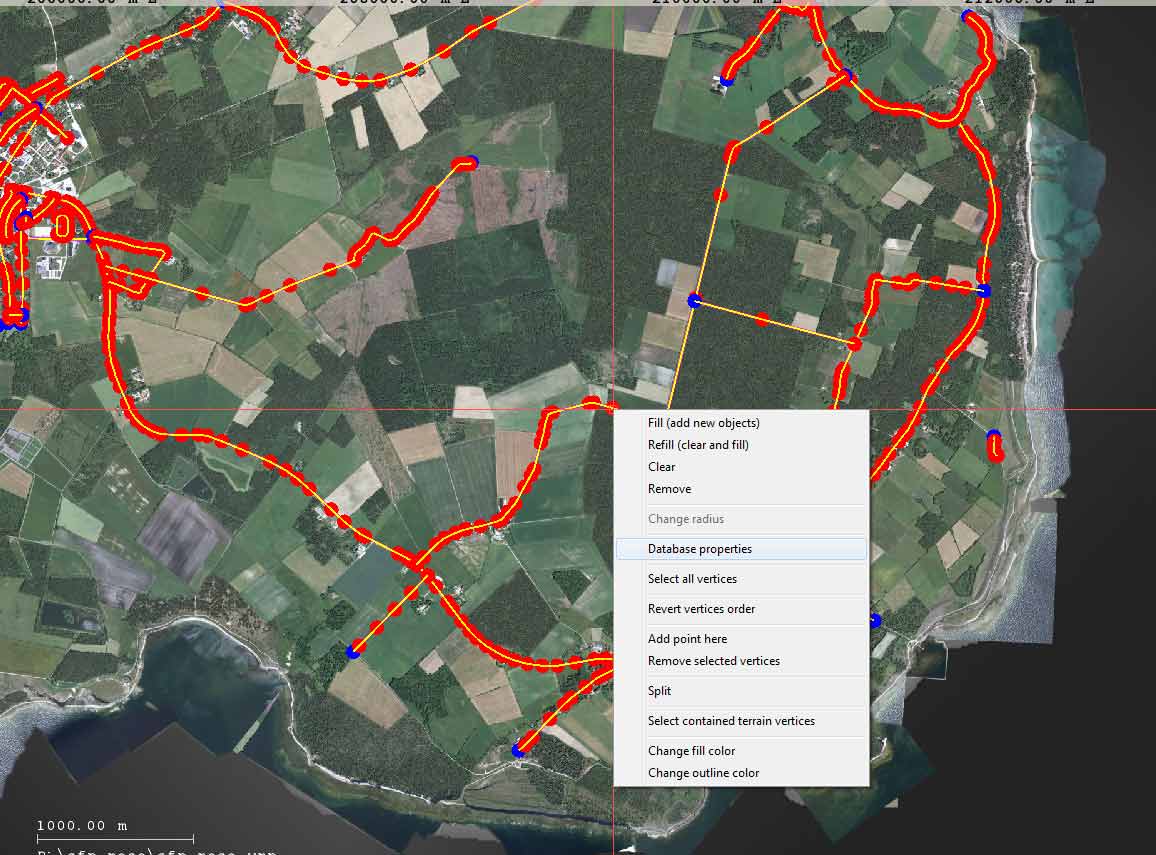
What you need to do is to select all roads and right click on one of them to bring up the menu.
Select Database properties
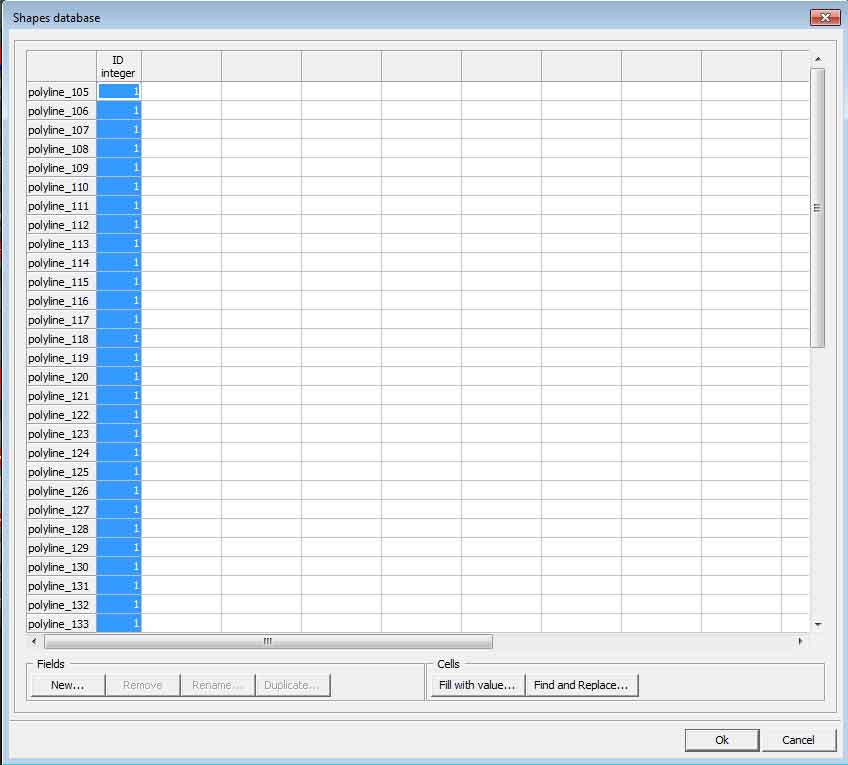
Click on New and name it ID and Integer.
Now select all the rows, and use the “autofil”. Type in 1.
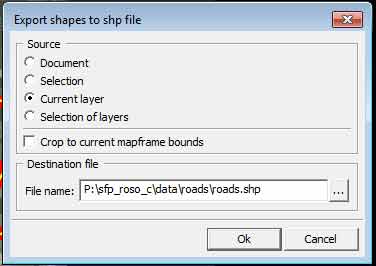
Last thing to do is to export our roads to shape files.
In the top menu, do the following:
File →Export → Shapes…
My path is: sfp_roso_c\roads\roads.shp
Part 2: P Drive files
Now first thing we want to do is to create a RoadsLib.cfg To get started, copy the content of my file.
// 1 = Country road
// 2 = City road
// 3 = Gravel road
// 4 = Bike road
// 5 = Path
class RoadTypesLibrary
{
	class Road0001
	{
		width = 10;
		mainStrTex = "a3\roads_f\roads_ae\data\surf_roadtarmac_main_road_ca.paa"; // lowercase!
		mainTerTex = "a3\roads_f\roads_ae\data\surf_roadtarmac_main_road_end_ca.paa";
		mainMat = "a3\roads_f\roads_ae\data\surf_roadtarmac_main_road.rvmat";
		map = "road";
		AIpathOffset = 0;
	};
	class Road0002
	{
		width = 8;
		mainStrTex = "a3\roads_f\roads_ae\data\surf_roadtarmac_main_road_ca.paa"; // lowercase!
		mainTerTex = "a3\roads_f\roads_ae\data\surf_roadtarmac_main_road_end_ca.paa";
		mainMat = "a3\roads_f\roads_ae\data\surf_roadtarmac_main_road.rvmat";
		map = "road";
		AIpathOffset = 2.5;
	};
	class Road0003
	{
		width = 3;
		mainStrTex = "a3\roads_f\roads_ae\data\surf_roaddirt_road_ca.paa"; // lowercase!
		mainTerTex = "a3\roads_f\roads_ae\data\surf_roaddirt_road_end_ca.paa";
		mainMat = "a3\roads_f\roads_ae\data\surf_roaddirt_road.rvmat";
		map = "track";
		AIpathOffset = 0;
	};
	class Road0004
	{
		width = 2.5;
		mainStrTex = "a3\roads_f\roads_ae\data\surf_roadtarmac_highway_ca.paa"; // lowercase!
		mainTerTex = "a3\roads_f\roads_ae\data\surf_roadtarmac_highway_end_ca.paa";
		mainMat = "a3\roads_f\roads_ae\data\surf_roadtarmac_highway.rvmat";
		map = "main road";
		AIpathOffset = 3;
	};
	class Road0005
	{
		width = 1;
		mainStrTex = "a3\roads_f\roads_ae\data\surf_roaddirt_path_ca.paa"; // lowercase!
		mainTerTex = "a3\roads_f\roads_ae\data\surf_roaddirt_path_end_ca.paa";
		mainMat = "a3\roads_f\roads_ae\data\surf_roaddirt_path.rvmat";
		map = "track";
		AIpathOffset = 0;
	};
	class Road0006
	{
		width = 10;
		mainStrTex = "a3\roads_f\roads_ae\data\surf_roadconcrete_city_road_ca.paa"; // lowercase!
		mainTerTex = "a3\roads_f\roads_ae\data\surf_roadconcrete_city_road_end_ca.paa";
		mainMat = "a3\roads_f\roads_ae\data\surf_roadconcrete_city_road.rvmat";
		map = "track";
		AIpathOffset = 2.5;
	};
};
Save it to the same folder as you exported the roads.
To see the roads in buldozer when you edit, we need to create the following:
P:\scripts\editor.sqs
~0.1
result = buldozer_LoadNewRoads "P:/sfp_roso_c/data/roads/";
YES / is used. It isn't a typo, the path should be with /.
BTW if you are using Lappihuan's Buldozer Tools, then edit the roads path to p:\scripts\userconfig.sqf (example is included in the SQF).
Part 4: Config
Last thing we need to make sure is to get the roads working ingame.
In your island config make sure you have this (with your correct paths of course)
newRoadsShape = "\sfp_roso_c\data\roads\roads.shp";
All done!
