Table of Contents
OFP Brsseb 3D Modeling Tutorial
OFP Forum, OFP Home, OFP File Formats, OFP Tools, OFP Missions, OFP 3D Modeling, OFP Terrain
Operation Flashpoint (OFP) aka ArmA: Cold War Assault (CWA)
Lesson 9: Custom Object Animations
Custom Object Animations by Brsseb
Preparing for the lesson
In this tutorial we will talk about how to set up simple animations for you addons.
- OFP version 1.85 of higher, O2 and Bulldozer
- Basic understanding of the O2 interface
- Having done several of my tutorials OR already being familiar with ofp addon making.
- PBOTool and TexView or similar program
- Some basic OFP configfile OR C++ skills will also be helpfull
Im assuming you either have done all or most of my other tutorials or are experienced in modeling and the o2 interface. Also, making object animations are mostly configfile work, so you better have some experience in basic configfiles and/or be familiar with some basic programming issues (C++). But as always, I`ll will provide you with what you need and will tell you how to do everything right. The goal of this tutorial is to serve as a reference or template for your own addons and you are free to use whatever code or tricks you learn from the tutorial.
Please note that you need version 1.85 (Resistance plus patch) or higher to to this tutorial since the animation code used is not compatible with older OFP versions! I will be using Eventhandlers, which was introduced in patch 1.85.
Lets get started!
The tutorial model
The model is all done. No need to model anything really, its all LOD and config work, plus a lot of theory on how all works. The model is really a garage style building. It has a main garage door big enough to park a small car inside, a switch to operate it, a small side door for the units to walk through and, last, a cool rotating satellite dish on the roof just for the fun if it :).
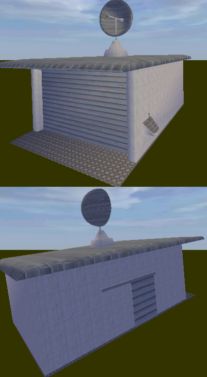 Two shots of the tutorial model we will be using.
The goal of the tutorial is to show you the most common animation types and tricks used on addons. Although the animation abilities for static objects in OFP is very limited, with the right tricks and settings you can still do some cool stuff. I will show you some of this in this tutorial.
Get the project folder with textures and configfile Brsseb_lesson9_start.rar from bottom of this page. Put the folder on the Z:\ drive and load up the p3d file firstanim.p3d and have a look at the model. Study it so that you understand whats going on. It should be easy stuff if you done some of my tutorials.
Lets look at the basic model together first.
The model consist of 3 walls and a front garage door structure. There is a hole in the side wall with a door cube. On the other wall, there is a console with a soon-to-be-operatable switch. On top there is a half-sphere that is shaped into a radar or satellite dish form. The model got some basic textures and don't look too bad for a tutorial modl (I hope).
The Geo lod got the walls and all the doors covered, with only the floor missing (see lesson 8 to learn why). Note that the door cubes are thicker than the original structures in 0.00 LOD. This is because they were too thin to work properly (a running soldier would bash right though it), so I made them a bit thicker. You will hardly notice it ingame, though.
The landcontact was explained in lesson 8 and all it does is creating a walkable area for the units to walk and drive on.
So, what we are gonna do is getting the garage door and the side door to open and close when the player walks up to them (you will get an option on the action menu). We are also gonna set up the switch so that it controls the main garage door. Then we are gonna make the radar on top of the garage to constantly spin around.
Move on!
Setting up "0.000" and Geometry LOD
First we need to set up some selections in 0.00 LOD. The OFP engine need to know what part is the garage door, what is the side door and whats the radardome, etc. We do that by assigning the various parts to selection labels, which in turn is “called” in the configfile making the animation work.
Lets get started right away:
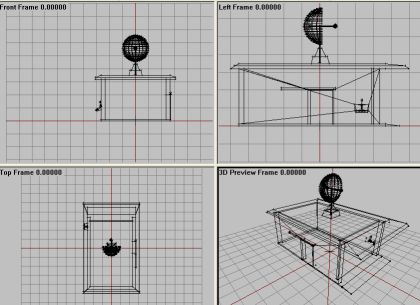
- Go to 0.00 LOD and select the large garage door. Name it “garage_door”
- Select the small side door cube and name it “side_door”
- Select the small switch structure and name it “switch”
- Select all the parts making up the radar dome and name it all “radar_dome”
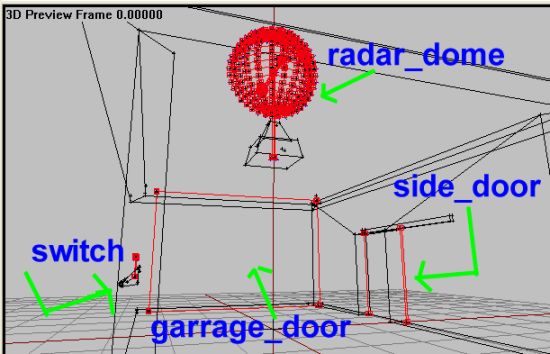 Here is a review of all the labels you need in 0.000 LOD
Then we need to make the same labels for the respective parts in Geometry LOD. All the labeled parts got a fellow part in Geometry LOD and those parts must be animated too. When the garage door opens in 0.000 LOD its counterpart in geometry LOD must do the same, or you will never be able to enter the garage since the geometry would be blocking you!
- Go to Geometry LOD and select the large garage door there. Name it “garage_door”
- Select the small side door cube and name it “side_door”
- Select the small switch structure and name it “switch”
- Select the simplified radar half-sphere and name it “radar_dome”
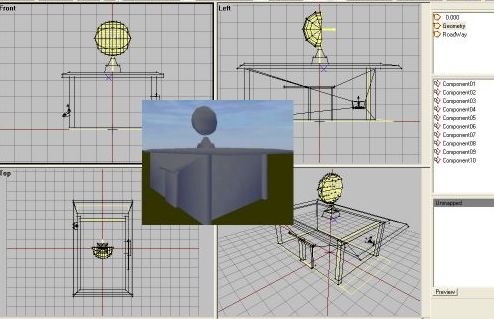
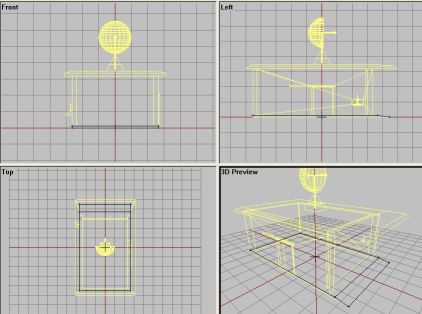
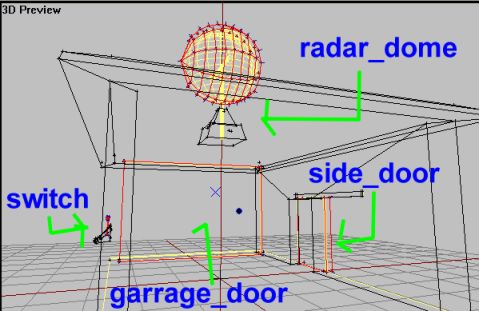 Here is a review of all the labels you need in Geometry LOD
OK then we are done with Geometry and 0.000 LOD. But we need another, all-important lod..Memory LOD
Next!
Memory LOD
In Memory LOD we define the “pivotpoints” or axes that the objects are to rotate around. If you did the helicopter and the plane tutorial you will be familiar with this (if not, I recommend you pay those tutorials a visit before you continue).
Lets go:
- Create a new LOD and change it to Memory LOD
- Now lets make the axis for the rotating radardome first. We could have created the vertices manually and then positioned them right, but this is easier:
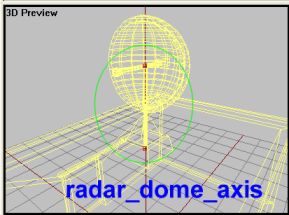
- Go back to 0.000 lod and, in Top view, focus on the vertical pole (cylinder) holding the radar. drag-select the inner vertices so that you got both center-vertices on the pole selected, like this:
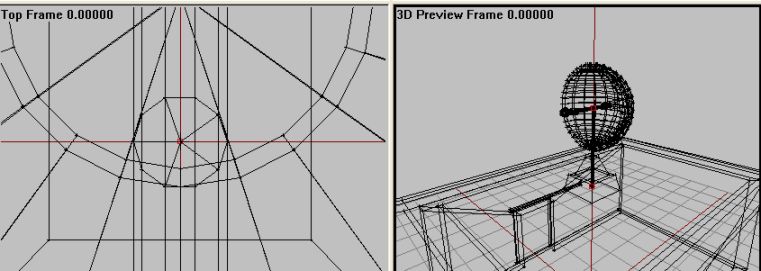 Select the two vertices that define the centerline of the cylinder.
- Hit CTRL-C to copy them and head back to Memory LOD. Paste them there (CTRL-V)
- Rename the two vertices “radar_dome_axis”. When you copy, you get a copy of the “radar_dome” label too. Delete this, we don't want that one in Memory LOD. These two points define the axis the radar will spin around. See previous lessons for more info about axises.
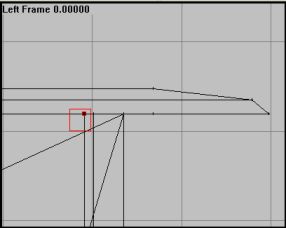
- Next, we need the axis for the garage door. We use the same trick. Head back to 0.00 LOD
- In left view, zoom in on the top of the garage structure and drag-select the rear set of vertices. Copy it too and head back to memory lod and paste it there.
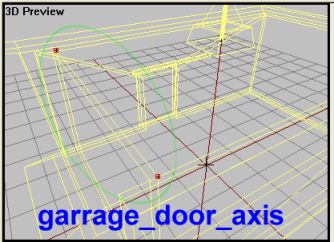
- Delete the “garage_door” label and create a new label named “garage_door_axis”.
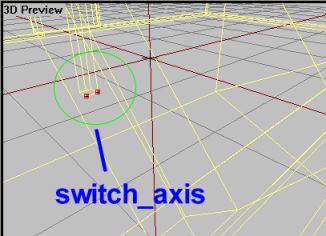
- Next, we need the axis for the switch. Still the same trick. Head back to 0.00 LOD
- In front view, zoom in on the bottom switch structure and drag-select the front-mostset of vertices. Copy it too and head back to memory lod and paste it there.
- Delete the “switch” label and create a new label named “switch_axis”.
OK, that's 3 of 4. The last one is easy to make but can be tricky to configure. So far we have created axises that makes an object rotate around it. All the stuff we have made so far are for either doors that swing open, a switch that flips and a spinning radar structure. All those are rotating objects in one way or the other. But what if we want a structure to slide, like a side door on a Huey, car or doorway?
Well, the truth is that you cant. OFP does only rotations, its a silly engine limit. But we can fake it to some degree. What if we place the axis faaaaaaaarrrr away from the actual door structure. And let it rotate only a small degree? Done right, and given that the door structure isn't too big, it might just look like the door slides linearly without rotating! See this illustration:
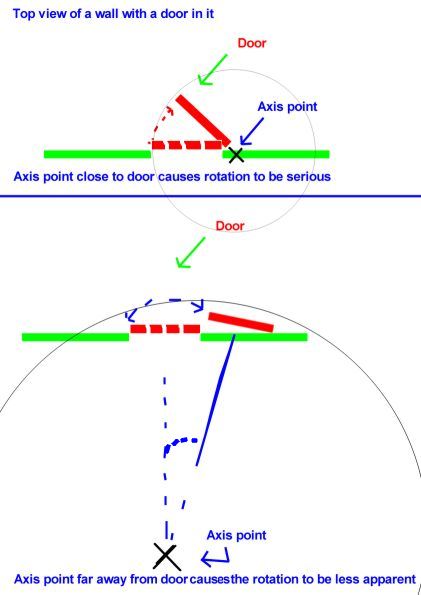 (But-ugly :) ) Drawing explaining how having the axis point farther away from the door “hides” the rotation somewhat and create the illusion of the door sliding left of right instead of rotating around a distant fixed point.
This is the main trick used to create sliding doors in ofp and it works quite well in most cases. Problem is that the larger the door is (say a hangar door), the more movement is needed to open the door (larger angle) and the more apparent the rotating effect will be. A trick would be to split the door into smaller doors and have them rotate separately, but it can be tricky to pull off.
For out sliding door, which is quite small, we wont have much problem. Figuring out a good location for the axis AND tuning the right rotation angle (more on that in the configfile in the end) is the main problem getting this trick to work. Thankfully for you I've already found a good spot for it :).
Lets rock:
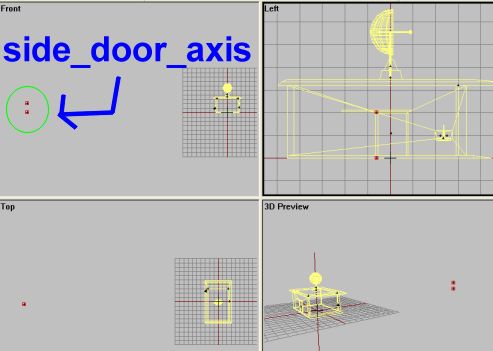
- In Memory LOD create two vertices somewhere.
- Select one of them and hit shift+E. Set the first vertex`s world space coordinates (X,y and Z) to X= -45, Y=0 and Z= -0.590
- Select the second vertex and hit shift+E. Set its world space coordinates to X= -45, Y=2 and Z= -0.590
- Select BOTH vertices and name then “side_door_axis”
Now if you understood the trick, you will know see we got an axis far away from the model and by letting the door move just a small degree, it will look like its sliding, and not rotating. The goal is to have the door slide along the door rail.
You gotta watch out for some issues when making an axis. If any of the doors seems to rotate the OPPOSITE direction then you compile the addon (don't do that yet, still some more stuff do to), then you gotta go back in o2 and reverse the axis, either by selecting it and hitting W or by swapping the vertice positions of an axis. I talked about this in lesson 6, and you should already know this.
Also, one thing that might cause trouble when doing your own “fake” linear animation is to not be tempted to move the axis too far away from the model. The OFP engine has a limit in how big a p3d model is allowed to be, and dragging the axis too far may result in either non-working animations OR OFP might crash to desktop on startup. So watch out (if someone knows the EXACT limit in meters, drop me a mail).
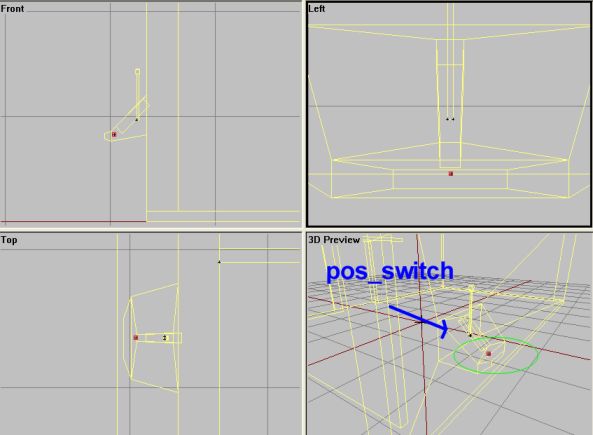
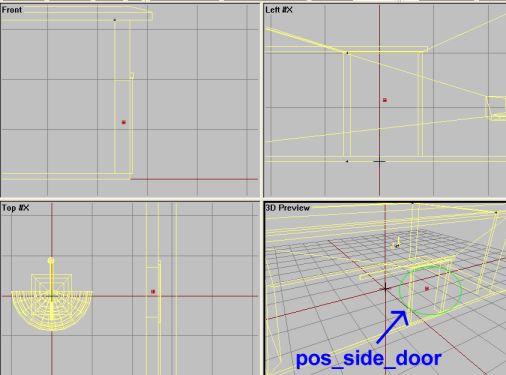
The last thing we gotta do is create some single vertices in various places to be used as trigger points for the action menu items (more on that in the configfile section). We need to place two vertices, one near the side door and one near the switch. Lets go:
- Still in Memory LOD, create a vertex near the center of the side door structure. Name it “pos_side_door”
- Add another vertex near the switch console and name it “pos_switch”.
I`ll talk more about the points later. Now we are done with the p3d, so before we move on to the configfile and compiling the addon, make sure you have done all the steps right and that you got no typos in the labels.
Next!
The configfile and animation setup
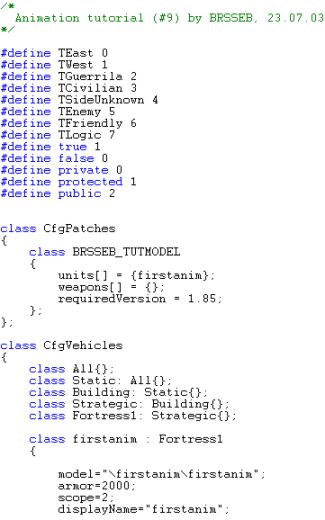
Time for the main attraction :), the configfile. This is where all the magic in object animation lies. Here we define the animations and control how they will be operated by the user. I assume you already know a bit about configs and how a basic house config looks like, so ill quickly skip to the new stuff.
Our house-class (or Fortress in this case, the subclass for houses isnt all that important. Fortress will do just fine) got a model and foldername named firstanim and you`ll find it under Objects→firstanim in the editor once compiled. Note the “requiredVersion” field saying 1.85. Trying to load the addon under older versions will give you a warning message when you start ofp.
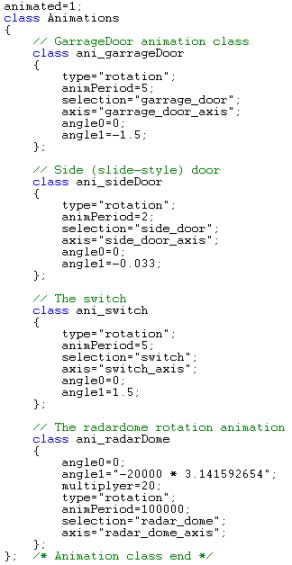
- The animation class define how each animation type will perform.
The animationclass is the most important new stuff here. It defines like what stuff to rotate, the name of the axis to rotate around, how long the animation takes to run and the angle (or amount of movement if you will) in radians to rotate. Each animation is given a class name (like ani_sideDoor) which will later be used to run them.
If you want to run an animation “manually” from the editor, say you want to have the side door slide open, you can put “this animate[“ani_sideDoor”, 1]” in the objects Init-field in the editor. If you want to start it using, say a trigger, you would name the firstanim object like “ABC” and you could start the animation with “ABC animate[“ani_sideDoor”,1] (you swap the 1 with 0 to close the door again). Its always a good thing to list all the animation class names in your addons readme file so that advanced mission editors can control the animations if they will.
If you look closely you will notice that all but the ani_radarDome looks similar to the other classes. The ani_radarDome is unique in this case since the radardome is supposed to spin around forever, not just move a certain degree (like the garage door moves from 0 to -1.5 (”-“ and ”+“ in front of the number control the direction relative to the axis. If you don't bother reversing the axis, you can just swap the positive or negative sign and the door will rotate the other way. 1.5 is in radians and is almost 90 degrees.)
If you study it, you will notice that the radar dome animation settings seem pretty odd. And they sure are! They seem to have an very large angle1 (60000+ in radians) and the animPeriod is set to 100.000. Well, the truth is that ofp didn't support constant rotating animations (except for some hard coded ones like the ship class` radar) and with normal settings and a angle1 set at 2*3.14159 (360*), it would just rotate one cycle and then stop. But thanks to some pioneers on the forums, they found a way to break this limit and create a constant spinning animation. Basically by setting the angle1 AND animPeriod to very high, you will force the radar to rotate slowly around the axis multiple times. It wont be forever, but with such a high angle (60.000 radians is A LOT of degrees!) and the time set to 100000 it will most certainly run for hours before it stops, and most people wont ever see it finally stopping.
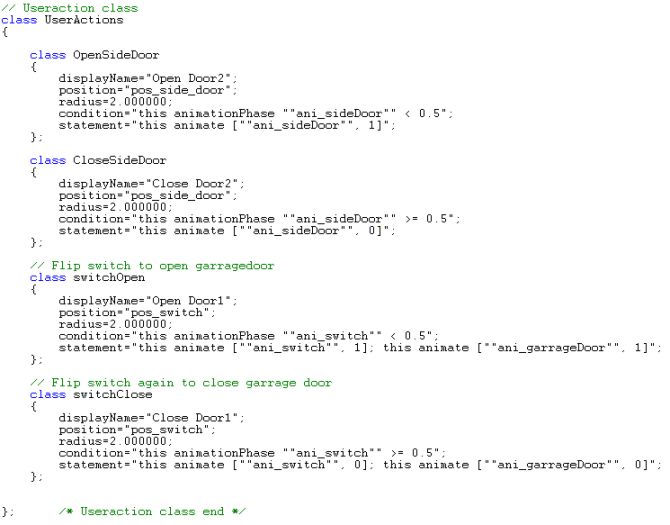 Useraction class in all its glory :)
The UserAction class defines how the player interacts with the animations. We basically want an action appearing on the action menu when we walk close to the side-door or the switch, allowing us to open or close the doors, or pull and push the switch. Note that no separate action is defined for either the main garage door or the radar, since the radar will be uncontrollable and the garage door will be controlled by the switch.
Lets look at the first class; it is the command for opening the side door (OpenSideDoor). Its display (which shows in the ingame menu) is “Open door2”. The position and the radius is the point you must be near (within the radius, which in this case is 2m) for the action to be shown on the menu. That's why we made those last points in Memory LOD.The condition field tells us that the side door must be half-way closed or closed for the “open door2” command to show up (we don't want to have the open-command display when the door is already open, then we want the close command (below) to be displayed instead). Last, the statement field triggers the animation with the usual “this animate[“ani_sideDoor”,1]” I told you about before. Note that in configfiles, all nested ” signs that are written double “”.
Also, you see the switch`s statements fields are also controlling the main garage door animation by adding a second “this anim….” field operating the garage door animation.
So that leaves us with a working side door, an animated switch that also operates the main garage door. But we need one more thing to get the radar animation to start.
 The Eventhandler class is a v1.85+ feature and is quite handy sometimes
The eventhandler is a nice addition to OFP and a small revolution on its own. Basically it checks if certain “events” happen to the addon, like “init” (when the addon is created in mission start), “engine” (the engine status of the addon), “fired” (when the unit is firing), and some more. It allowed you to execute commands or scripts when these events occur, with the init-command being the most handy of them all since it allowed you to set up features on the addon prior to mission start. In our case, we want to start up the radar animation.
This is done with filling out the init-field with the rather strange-looking variant of the “this animate[“ani_radarDome”,1] field. Notice that instead of just the normal “this”, you have ”(_this select 0)“ instead. This might seem strange and it sure is. Thrust me, if you don't write it that way in the eventhandler class you will get in trouble. If you use normal “this” in an addon eventhandler, you might get unexpected results, so remember that! (thank you Bratty for this info :) )
OK, that was the configfile and a bit info about animations. Hope you learned some of it and maybe can use this information on your own addons soon. Lets get this structure ingame and see how it all looks like!
Next!
Ingame testing
Ok, time to test it ingame. Make sure all steps are completed right and compile the file the usual way, naming it firstanim.pbo. Its under Objects→firstanim in the editor.
Walk up to the console and try the garage and switch animation to see if they work OK. Then make sure the side door works and that the fake linear animation trick works nice. Also, the radar should be spinning strait away. If all that seems OK, then congratulations :). If one of more of the doors seem to rotate wrong (maybe the side_door sliding the other direction), then go back in the p3d and reverse the axis (or switch the +/- signs in front of the angle1 setting for the offending animation)
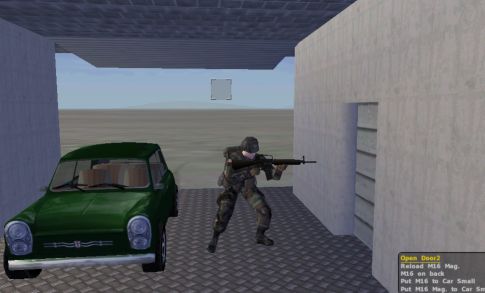 The garage can fit a small car with no problem. Notice the Door2 action appearing on the menu.
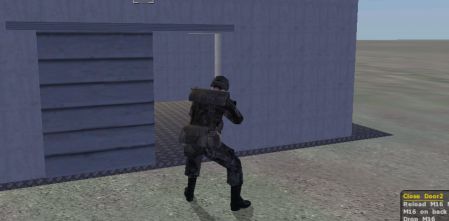 The side door “fake” linear effect seems to be working OK.
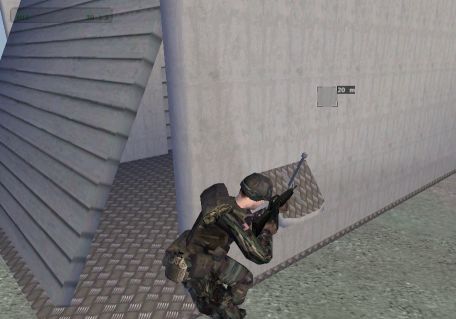 ..and the door moves then you pull the switch as it should do. Nice :)
Well, hope you liked the tutorial. You can get the final working PBO Brsseb_lesson9_done.rar from below. Look at it if you got trouble. If all fails or you have further questions, don't hesitate to mail me at brsseb@hotmail.com
Cheers!
Next!
Download OFP.Brsseb_Lesson/ Torrent Magnet from below:
magnet:?xt=urn:btih:40aac3407210ddb8ffcee06cdb009c0b099ccdce&xt=urn:btmh:122046986f756bcebf9744dc9f81bc3fc736a54e164113ec62e18c827a4a06271364&dn=OFP.Brsseb_Lesson&tr=udp%3a%2f%2ftracker.opentrackr.org%3a1337%2fannounce&tr=udp%3a%2f%2ftracker.openbittorrent.com%3a6969%2fannounce
Notes
This tutorial was written by Brsseb in ofp.gamepark.cz/_hosted/brsseb/, it was posted here with his permissions, thank you Brsseb!

