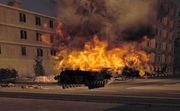
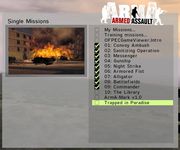
OFP Overview Picture
OFP Forum, OFP Home, OFP File Formats, OFP Tools, OFP Missions, OFP 3D Modeling, OFP Terrain
Operation Flashpoint (OFP) aka ArmA: Cold War Assault (CWA)
Creating a picture for mission overviews
Images to be used in the mission preview have to meet certain criteria to have the right position and size.
Here's a quick walkthrough to creating a proper image.
Take a relevant snapshot while in the mission
OFP (as well as ArmA & VBS) don't have built-in screenshot-taking capabilities, so you will need a third-party program to do this. There are many different ones available, but the most popular ones in the gaming community are FRAPS or Game Cam, which also have several other game-related features, like movie capturing and FPS (frames/sec) display.
Crop it to size
Once you have an appropriate image, crop it to a proportion of 1:1.625 (height:width). So - an image 315 pixels high should be 512 pixels wide.
You can use different proportions, but these are the ones that fill out the menu frame in the mission preview the best.
Reformat it to the right proportions
Images used in overview.html must have specific edge sizes (i.e. the size must be 2^x). The most common sizes are 128, 256 or 512. So, you could have an image that's 256×256 or 512×256, but you couldn't have one that's 500×300!
Once you resize your image to the proper proportions it will most likely look distorted. This is ok, as later in the game it will be resized again to the correct proportions.
When you do distort the image it is normally better to make it bigger, rather than smaller to meet the next allowed edge size (e.g. if your image is 300×487 make it 512×512, rather than 256×256).
Save the picture in .JPG format.
Define the overview.html
In your overview.html you need to call the image via an HTML tag:
 <html>
 <head><title>Mission Title</title></head>
 <body>
 <br>
 < p align="center"><img src="lost.jpg" width="155" height="95"></p>
 </body>
 </html>
The size to use if you want to fill out the predefined image frame is 155×95.
If you used different proportions for your original picture, you will have to adjust the sizes here too.
Compile your mission
Use any of the many OFP tools available to create your PBO files.


