Table of Contents
OFP Brsseb 3D Modeling Tutorial
OFP Forum, OFP Home, OFP File Formats, OFP Tools, OFP Missions, OFP 3D Modeling, OFP Terrain
Operation Flashpoint (OFP) aka ArmA: Cold War Assault (CWA)
Lesson 2: Creating your first car
Creating your first car by Brrseb
Preparing for the lesson
So you`re ready to begin your second lesson, huh? Well, if you ever wanted to know how to make a car in OFP you`re in the right place. This lesson will teach you the basic on how to set up a car in OFP. It wont teach you how to model one (3d modeling lessons can be found all over net), but a step-by-step guide on how to get a car model in the game.
If you haven't already made a car model that you want to test in OFP, you can download a very simple model from this site (see next page). I`ll be using that one during my tutorial. Be aware, compared to Mechanics fine automobiles this one is so ugly your eyes will burn.
But to make up for my lack of modeling skills, I`ll make sure that we get to test our model in OFP very early on! I have read many different tutorials for different stuff and many of them are very long and it takes ages before you get some results. No such things here. Here we get to make some small adjustments, compile and test our result right away! That means a little hard work made up by LOT of fun test driving in OFP during the tutorial.
So, what do we need then. Lets see:
- OFP (daahhh), O2 and Bulldozer
- Basic understanding of the O2 interface
- Having fully understood stuff from lesson1 (like creating LODs, selections etc)
- PBOTool and TexView
OK, that's the most important things. Lets have a look at our model next:
The car model
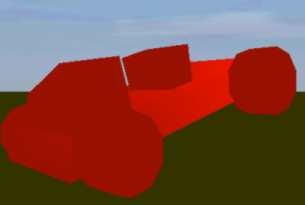
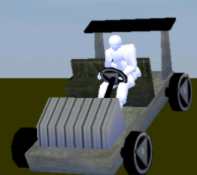
Lets have a look at the model that I will be using during this tutorial. Its ugly as hell but its all you need to get a good understanding on how to get a car model into OFP. Well, here it is:
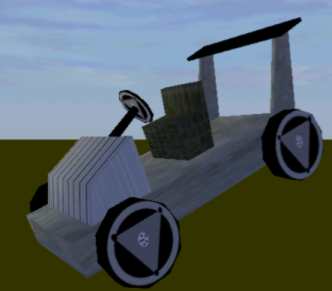 Simple car model with textures.
So, you can either make your own model and use that for this tutorial or you can just download the one I made and start using that one. Download mine and this lesson will take a shorter time. If you make your own model sometime and are unsure on how to get in ingame, just run trough it again with your new model. But for starters, download my model.
- Download car model with textures and configfile Brsseb_lesson2_start.rar from bottom of this page.
- Put the firstcar folder in the same place you installed Bulldozer
When you have done that, open the p3d-model and have a look at how the model is put together. Its simple stuff. Just some resized box- and cylinder-structures with textures on them. Currently there are only two LODs there, “0.000” and Geometry. There LODs should already look familiar if you've read lesson 1.
The basic geometry is set up. I have selected some key structures, created selections them and applied some weight. Note that the geometry doesn't cover all structures of the original model (like the spoiler, whole seat etc). Its just because I didn't feel it was necessary for such a simple model in such a simple tutorial. So just leave the Geometry LOD the way it is.
Getting the model in-game
Yes, that's right. Its already time to test our model in-game! And for those of you who have downloaded my model didn't have to do any real work at all! To test the model do this:
- Start PBOTool
- Select “compress” and choose the firstcar-folder
- Save the thing “firstcar.pbo” in your OFP addon-folder
- Start OFP, run Editor and select your new car (Civilian→Car→My First car)
- Drive around until you get bored.
Now if you have tested it you might have noticed that its pretty crappy right now. The steering wheels wont turn, you don't see the driver, impossible to see anything in first person view, the thing seem to jump/stutter on the ground and, hell, even the wheels don`t turn. This is what we are going to fix during this tutorial.
Now you might wonder how our model suddenly became a real functional OFP car just like that. And if you look closer on the model you`ll see that its not that much separating your car model from that silly crate-model we made in tutorial 1. So how did this happen? The answer lies in the config-file:
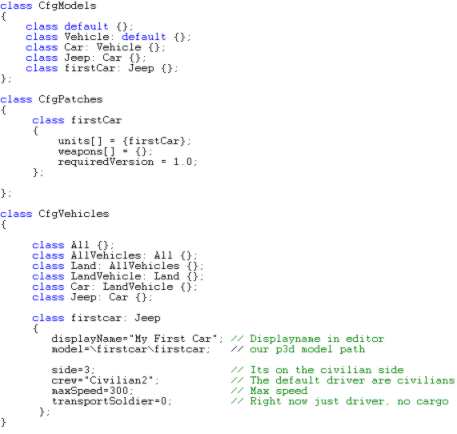 The important part of the config-file, the “Firstcar” class.
Now tricks or magic. Its just that our car has a different config-file than our crate. And a much bigger and confusing one. Many features and settings that no doubt will make the newbie feel a little down. But fear not, its not that hard. Lets have a look at the important settings:
- Side: The “3” indicates that this is a civilian unit.
- MaxSpeed: The fastest speed the unit can reach.
- DisplayName: Explained in lesson 1. The unit name in editor.
- model: Explained in lesson 1. The path for the p3d file.
- transportSoldier: 0 means “no”, 1 means “yes”. Our model is currently a one-seater, so we leave this to 0.
- crew:“Civilian2”: Since this is a civilian model we want a civilian driver as a default.
There are some other features that we`ll look at when the time is right, but these are the important ones right now. If you are somewhat experienced in object-oriented programming you`ll see that while our crate was classified as a static object, our car is classified as a LandVehicle of some sort, and then I have “stolen” the Jeep class. Then I just have to set a few important attributes and get the rest for free. Inheritance at work! I'm not going to give you a lesson in config-file making, so I wont go into any detail about why and how each setting work. Find a config-file tutorial at PMC Editing Wiki if you really want one.
What I can say it that I've stolen most of the standard West OFP Jeep attributes. Right now the physics model (braking distance, damperforce, turnradius, etc) are exactly the same as the West→Car→Jeep in OFP editor. Get the “Commended Config” files from Bohemia Interactive Studio: Breathe if you really must know all the details about the jeep. Other just ignore this info for now.
So, now lets get our model in shape.
Making the wheels turn
First thing first, lets make the wheels turn! That is probably the most stupid thing with our model right now. All wheels turn, don't they? (Except for the spare one, I guess :) ).
To make them turn, OFP must know were your wheels is. We do that by selecting each wheel structure and define a pre-set selection for them in the main LOD, “0.000”. Simple really, the bad thing is that you have to write the selections in Czech! Jep, that's true, but don't worry, I will give you all the details you need. Here we go:
- Fire up O2 and Bulldozer
- Go to your “0.000” LOD (double click it to activate)
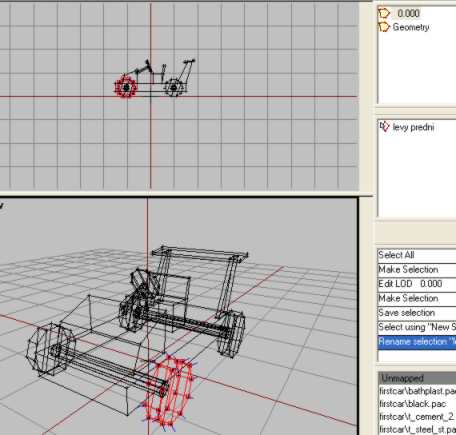
- Use F2 selection mode and select the front left wheel structure.
- With that selected, make a new save selection (in the “Named selection window”) and call it “levy predni”. It means “left front” in english.
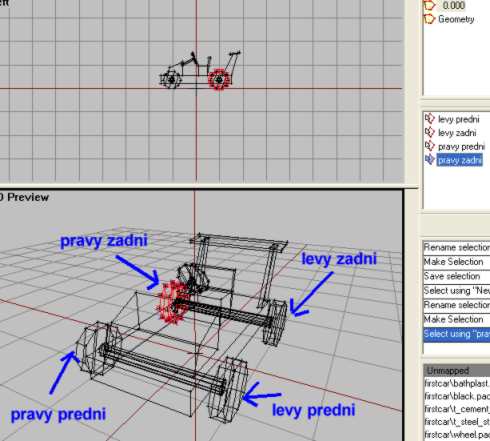
Its the same way for all the wheels, just with different names for each wheel. Select a wheel, define a selection with the right name. Simple. Here is the final pic with names for all the wheels:
- Pravy predni = right front
- Levy predni = left front
- Pravy zadni = right back
- Levy zadni = left back
And now you can test your model again. Note that all wheels are turning (if you named them right, that is. No typo`s). Also, the front wheels are steering when you steer! Great, isnt it? But there is still much to be done. Lets move on.
LandContact LOD
Next one is very important for the physic model.
For all moving objects, OFP will like to know which parts of the model is in contact with the ground. What we need to do is to place out 4 vertices, one under each wheel. Then select and name each vertex with more czech gibberish :). Lets move:
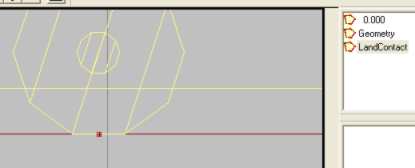
- Make a new LOD, it will be called “1.000”. Right click on it, go to “properties” and select “LandContact” from the list. Hit OK.
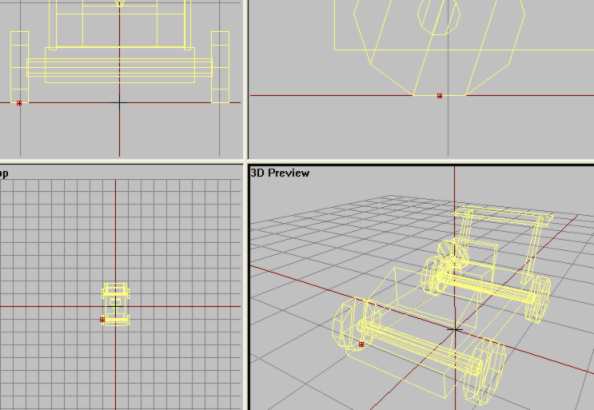
- In left view, zoom in (ALT + right and LMB) and move the cursor just beneath the front set of wheels.
- Then hit “insert” and a new vertex will be created there. See pic below.
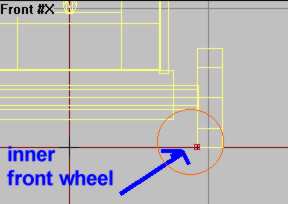
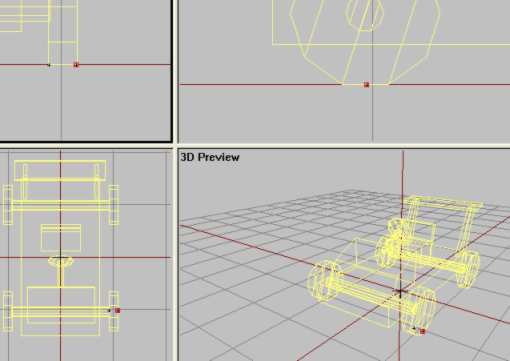
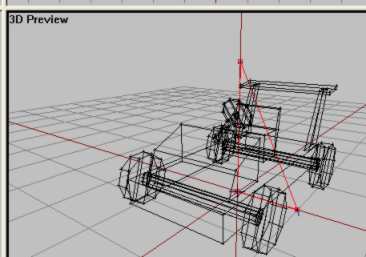
- Now go to front view, lock the x-axis (hit “x”-button) and move the pixel just right under the right front wheel. Should look like this in 3d view:
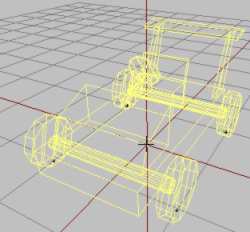
Now you know how to do that. You must place one vertex under each wheel, so use the info above on how to do place the last 3 vertices. It should look like this afterward:
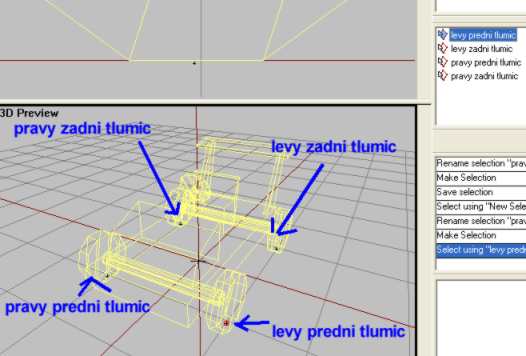
Now we have to do the same thing as the last page, select one at the time and define a selection for it. Select the front right vertex, make a new selection and call it the right name, etc. Here is the selection names:
- pravy predni tlumic = right front damper
- levy predni tlumic = left front damper
- pravy zadni tlumic = right back damper
- levy zadni tlumic = left back damper
Done with that. Good. Now things like dampers will work properly and should eventually give you a much more smoother ride. But we arent done yet. Next one then.
Placing markers for the wheels
Well, we got the dampers working, but ofp isn't quite satisfied yet. It also need to know more about the wheels and how it interacts with the ground. More vertex placing and selection-naming I am afraid.
There is a total of 8 vertices to place, two for each wheel. But unlike the last page where we placed one in the middle under each wheel, we need one at each wheel edge. Lets move:
- Create a new LOD and change it to Memory LOD.
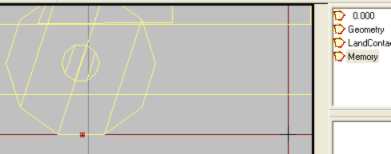
- In left view zoom in to the front wheel pair, place cursor right beneath wheel and press “insert” to create a vertex.
- Go to front view, lock x axis and move the vertex to the inner edge of left front wheel.
- Now hold down shift, and drag the vertex to the outer wheel edge and a copy should appear there. See pic
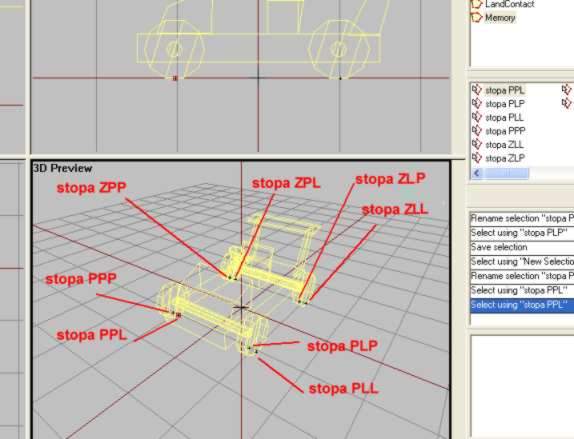
Now a same pair of vertices should be placed under the last 3 wheels. Do this now. Then select each vertex (one by one, not pairs!) and make a save selection for each of them. See picture for all the selection names.
- stopa PLP: Front Left Right marker
- stopa PLL: Front Left left marker
- stopa PPL: Front Right left marker
- stopa PPP: Front Right Right marker
- stopa ZLL: Rear Left Left marker
- stopa ZLP: Rear Left Right marker
- stopa ZPL: Rear right Left marker
- stopa ZPP: Rear right right marker
Now that's done. It is hard work, I know, keeping all the PPLs and ZLL under control. Don't worry if you screw it up the first time, but keep trying until you get it right. When done, test if you want and move to next page.
Making the Steering wheel turn
The steering wheel on our model doesn't turn whit the wheels. We`ll change that. Lets go.
- Go to “0.000” LOD and select the steering wheel structure (F2).
- With it selected, create a new selection and name it “volant”. That means “steering wheel”.
But that aint enough to make it work properly. It needs an axis to spin around. And we need 2 vertices to do that:
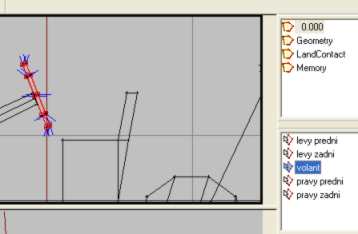
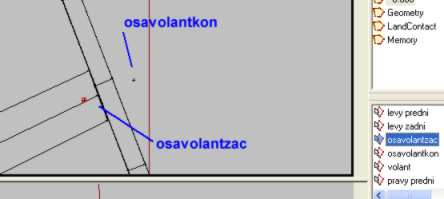
- In left view, move cursor and create two vertices like this:
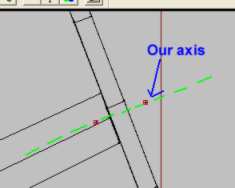 Both selected to show the better in pic. Green lines added to indicate axis.
- Select the left-most vertex, create new selection and call it “osavolantzac” ( means “axis of steering wheel start”).
- Select the other one, create new selection and name it “osavolantkon” ( means “axis of steering wheel end”).
OK, if you compile and test now, the steering wheel should work fine. One thing though, note that we used a structure with a texture on it as the steering wheel. Usually people use a texture with a transparent background color. That way you can have more realistic steering wheels. But that's a bit harder to do and not for this tutorial. We keep it simple, don't we?
OK, next!
Making the driver show up!
Even when there is someone in the car, no model of the driver sitting in the seat is shown. We will fix this now.
But we need to have a serious chat first, and its about proxys. A proxy is a “model in the model”. You simply put an driver 3pd model into our car p3d model to see how we should place the driver in its seat. Do this:
- First: Inside the ZIP you downloaded in the beginning is a JeePDriver.p3d model from the OFP demo of a man driving. Find it and put the p3d model in the data3d-folder in bulldozer.
- Start o2 and bulldozer, open your firscar model and make sure you are in the “0.000” LOD.
- On the menu, find Create→Proxy.
- In the dialog, just write “JeepDriver” and hit ok
A triangle made of 3 vertices should show up. This is the driver model proxy in o2.
But if you have a look at Bulldozer, the full driver model will be shown. The driver model wont be added to your car-model or the final PBO, its just there for reference. Ingame, OFP will find the driver model in its own data3d folder. But this will help your in placing your driver correctly. And no, the proxy model doesn't have textures.
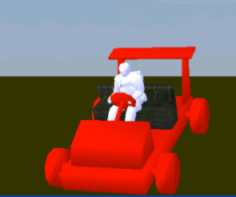
Select the driver proxy (triangle) using F2. We need to rotate and move it to make the driver sit in the seat. You should be able to do this by your self, rotating and moving was learned in lesson 1. When you have the driver roughly in the seat, use o2 to make small adjustments to the proxy position and use bulldozer to see how it looks. (You might have to tilt it a little to get more room for his feet!) Try to make the model sit nicely in the seat, like this:
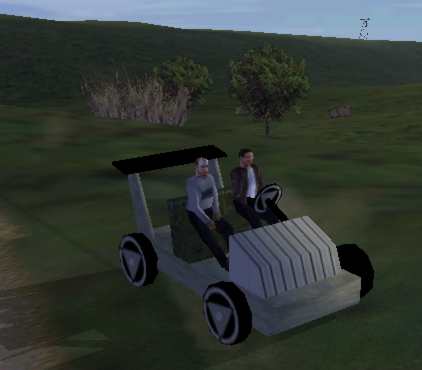
 Drivermodel rotated and moved into right position.
Now, compile and test it. If your`re not happy with the placing of the driver, load up o2 and try again. Move on to the next lesson when your`re done.
Adding passengers
Lets make space for a passenger, shall we? Well will extend the seat (like a coach), move the steering wheel to the side and add a proxy model for the passenger. We`re off:
- Start o2 and head for the “0.000” lod as usual.
- Go to front view and using F2 select mode, select the seat structure.
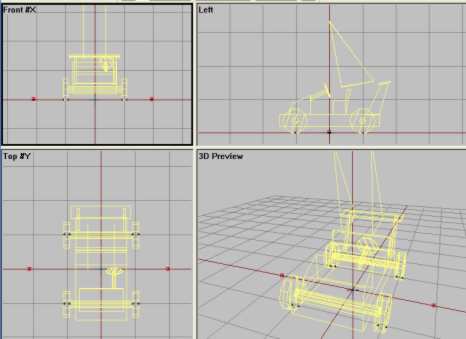
- Use the scale-function on the menu, Points→Tranform 3d→Scale. Set the X-value to 2 and hit OK. Also, in the Geo LOD, resize the block meant for the seatblock. The seat will now be like this:
- Now select the steering and the driver proxy (triangle). Make sure to select the wheel, the pole, the driverproxy and the two points indicating the steeringwheel axis
- Using front view and with locked x-asix, move everything to the right (or left, if your british of something :) )
 It should look like this in Bulldozer.
Now we need a proxy model of the passenger. And there happens to be another p3d model of a passenger called JeepCoDriver.p3d inside that ZIP your got from the start of the tutorial. Find it and put it in the same folder as the last one (Data3d in Bulldozer).
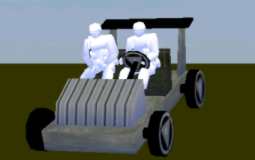
Now we do the same thing as for the driver proxy and your should be able to do that easy if you understood the last page. Remember to write “JeepCoDriver” instead of driver when you add the proxy. Then rotate and move it into position using Bulldozer to check how it will look ingame. Here is how it should look:
When your`re happy, WAIT, don't compile yet! No no! There is something we must do first:
- Double click Memory LOD to activate it.
- Head for front view and place your cursor on the red line (indicating ground level) and 2 grid-squares to the right of origo. Then hit “insert” to make a vertex.
- Do the same on the other side of the car. You should now have 2 vertices on each side of the car at ground level like this:
 Both vertices selected to help seeing them
- These vertices will indicate get in/get out positions for your vehicle. It tells you which area they must stand in in order to get in the vehicle.
- And of course we must name each one with a saved selection like before. Call the one on the driver side “pos driver” and the other “pos cargo”. Now both the driver and passenger can easily step in and out of the vehicle. (Note: you don't need to stand exactly on the vertex, just near it)
So, test time yet? Nope, but we`re almost there. We must do some changes to the configfile to allow our car to carry passengers.
- Head for your firstcar folder in Bulldozer and open the config-file there (use notepad).
- Find the “transportSoldier=0;” and change it to “transportSoldier=1;”. Now you can carry one passenger.
Compile the thing, check that getting in/out works for both driver and passenger etc. NOTE: If the get in/out doenst work properly, try moving the “pos driver” or “pos cargo” vertices up or down. I solved a problem like that by zooming in and moving them closer to the red line. Experiment with the height a little if you run into problems.
Nice, huh? Next one, then.
Mission Complete, Soldier!
Congratulations, if you made it this far, you now know the basics of making a car for OFP. And if the car hasnt made your OFP-version crash and burn, then be proud!.
Some may be disappointed now, saying like “it that it”?, and experts just stopping by crying out “Where is the stuff about Fire Geometry or Hitpoints”. Well, this is a basic tutorial and my goal was clear, to give you some basic skills in OFP car making. And now you`ve got it. Thus, Im tierd of writing.
There are many things yet to discover, like how to make glass for windows, proper hitpoints and fire gemoetry LOD, working instrument panels, front and brakelights, etc. Now the road ahead is open. You must head out to the forums, download LOADS of different car addons, break open their pbo file and analyze how the experts do it. I can personally recommend Mechanic's amazing vehicles. And you can download the finished tutorial model Brsseb_lesson2_done.rar OFP.Brsseb_Lesson/ Torrent Magnet from below:
magnet:?xt=urn:btih:40aac3407210ddb8ffcee06cdb009c0b099ccdce&xt=urn:btmh:122046986f756bcebf9744dc9f81bc3fc736a54e164113ec62e18c827a4a06271364&dn=OFP.Brsseb_Lesson&tr=udp%3a%2f%2ftracker.opentrackr.org%3a1337%2fannounce&tr=udp%3a%2f%2ftracker.openbittorrent.com%3a6969%2fannounce
Now just knock yourself out with your first car addon for OFP. Have some fun with it, drive it to it breaks down (head for the configfile and change the top speed to 600 or so, THAT is fun!).
Thankz for following this tutorial. As always I'm happy for all the feedback I can get at brsseb@hotmail.com (I'm on MSN almost everyday). Cheerz!
Notes
This tutorial was written by Brsseb in ofp.gamepark.cz/_hosted/brsseb/, it was posted here with his permissions, thank you Brsseb!
