This is an old revision of the document!
Table of Contents
QGIS Real World Data Tutorial
ArmA 3 QGIS Real World Data Tutorial By Ross
Using QGIS to export satellite image ready for Terrain Builder project
This process has often been described using Global Mapper, but I wanted to detail the equivalent steps within the open source GIS app QGIS
The goal is to achieve an export image with the same or better quality than would be possible with Global Mapper
The visual below shows an example of the 2 processing routes I reviewed to check loss of image quality due to compression and reprojections
I will detail Route A - because it only requires 1 compression and reprojection pass over the raster which may help preserve image quality

Software required:
Brief overview of steps:
For single tile export
- Load in just the .map files into QGIS
- Merge Rasters
- Align raster to 1mtr cell size and re-project to appropriate CRS for its geo location
- Change the ‘Project Coordinate Reference System’ (CRS) to match CRS in previous step
- Create shapefile layer
- Create square Feature using Advanced Digitizing panel
- Export sat image ready for Terrain Builder using ‘clip raster by mask layer’
For 4 tile export
- Load in just the .map files into QGIS
- Merge Rasters
- Align raster to 1mtr cell size and re-project to appropriate CRS for its geo location
- Change the ‘Project Coordinate Reference System’ (CRS) to match CRS in previous step
- Create shapefile layer
- Create grid – 2 x 2 Feature
- Move each quarter to its own shapefile layer
- Export 4 sat images ready for Terrain Builder using ‘clip raster by mask layer’
I shall primarily focus on the steps for generating a single tile export, but will explain additional steps required for a 4 tile export at the end – which would suit those terrains that are 40960px x 40960px and higher.
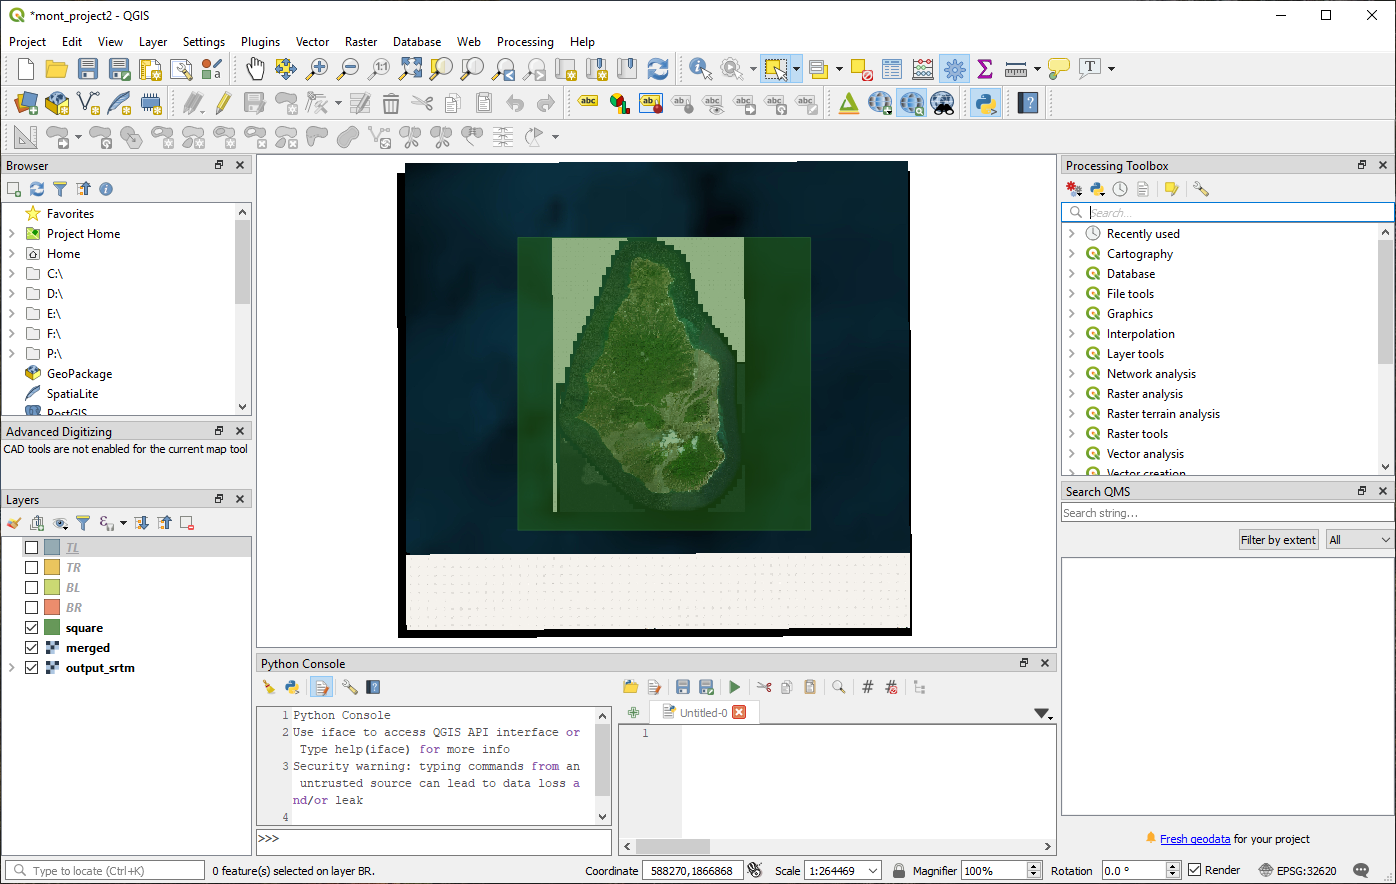
Load just the .map files into QGIS
Terra Incognita will generate tiled images with corresponding .map files, these .map files hold the CRS details within them. You will only need to drag the .map files into QGIS’s central pane. They will automatically link back to the images (jpg’s, tif’s), located where you originally saved them.

Merge raster’s
Top Menu - Raster → Miscellaneous → Merge
Select all your .map files as input layers


Don’t forget to change Output data type to ‘Byte’ as the default is ‘Float32’.
Select ‘Save to File’ under Merged – as the default is to a temporary file.
Stitching together a collection of .map files is fairly simple using the Merge function, depending on the size of your project it will however create large .tif exports. The example above generated a .tif file of 5.42GB – for an area that covers approx 40 x 40km. This took 36 minutes to complete the processing, so be patient.
Once complete you will get confirmation and the time taken to process in the Log tab:

Align raster to 1mtr cell size and re-project to correct CRS
I am working towards a cell size of 1m - so within Terrain Builder in my ‘Mapframe Properties’ you would find this >

The reason we have to align raster to 1m cell size within QGIS is because even though Terra Incognita is saying
it’s generating exports at - 1m/px >

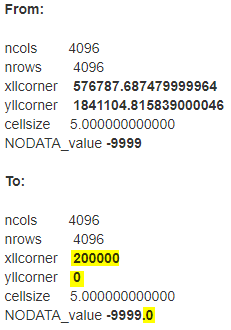
If you double click on one of your .map raster’s in QGIS Layers panel you will see in the Information tab that it’s not exactly 1m >

Top Menu – Raster > Align Rasters Add the raster generated in the previous Merge raster’s step:

Tick both CRS and Cell Size:

Change settings to suite your cell size and appropriate CRS projection:

Change the ‘Project Coordinate Reference System’ (CRS)
Clicking on the CRS section bottom right within QGIS – will bring up the Project Properties for CRS
It will probably be on a Generated CRS which looks something like this:

Select the CRS to match the same selected in previous Align Step, in this example its ‘WGS 84 UTM zone 30N’ because the terrain is from the United Kingdom. See also UTM projection.
Create shapefile layer
Top menu – Layer > Create Layer > New Shapefile Layer
Change Geometry type to ‘Polygon’
Right click on shapefile & select ‘Toggle Editing’

Create square using Advanced Digitizing panel
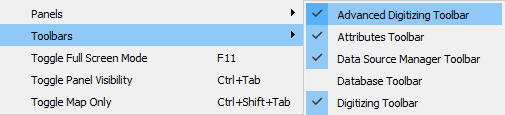
From menu – View → Toolbars → Advanced Digitizing Toolbar
Select ‘Add Polygon Feature’

Select Enable advanced digitizing tools

To create a perfect square, left mouse click for your top left starting point, move your mouse to the right a little, then press ‘d’ on keyboard, type in the exact width (distance) required (in this example ‘40960’) then immediately press Enter – be careful not to move the mouse before pressing Enter or it will mess up the number. Press left mouse click and you will have drawn your first horizontal line which turns red. By default this tool snaps to 90 degree angles, making it easy to draw your lines. Now to draw the vertical line start moving mouse your down, press ‘d’ again and type in same figure as above, press Enter and another left mouse click, repeat the process for the last 2 lines of the square.

After the last left mouse click from the step above, the tool is still waiting to plot more points, so to finalise the square do a right mouse click

This will then bring up a dialogue – just type any number and Enter
Because the new square polygon feature is filled with a colour it’s hard to see your sat image behind, so I tend to double click on the shapefile in the layers panel on the left, and in the Symbology tab set the Opacity for both available options to 70%

To move your square just select Move Feature and shift it to the desired position over your sat image

Once you have finished with your polygon feature, remember to right click on shapefile layer & click‘Toggle editing’ so changes are saved to file.

Export satellite image ready for Terrain Builder
Menu – Raster → Extraction → Clip Raster by Mask Layer
Input layer - is the raster generated from the Align Raster step
Mask Layer - is the shapefile created in the previous step
Double check these are both the same CRS
Change Output data type to ‘Byte’
Once your clipped file is saved, check the image dimensions match exactly to those defined in the Create square step.
When saving to .bmp (best format for Terrain Builder) you will find there is a 4GB hard limit.
This will obviously be dictated by the size of your chosen terrain
If you keep under 4GB you can use a single square feature selection shown above
If you are likely to breach the 4GB limit, you’ll need to look at 4 tiles for your feature selection.
See below steps to generate 4 tiled feature selection.

Create grid -- 2 x 2 Feature - ready to export sat image into 4 tiles
You will need to have created the square feature first – see above steps
Top Menu – View → Panels → Processing Toolbox
Processing Toolbox Menu – Vector Creation > Create Grid
Set Grid type to ‘polygon’ & the Horizontal & Vertical to half the distance of your main square

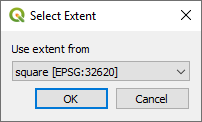
Select the shapefile created above for your main square

Set it to save new grid feature to .shp file

Your original square feature selection

will then be Covered with a new grid of 4 tiles – perfect quarters of your original square

Because you will need to export each quarter separately for use in Terrain Builder, we will move each quarter onto its own shapefile layer.
Click Select Features -

And select the first quarter:

Top Menu – Edit > Copy Features
Then… Edit → Paste Features As → New Vector Layer
Save shapefile layer to something obvious
I’ve used ‘TL’ for top left.

Repeat for the remaining quarters and you’ll have something like below, ‘Grid’ can be deleted.

You will then have 4 tiles ready for reference in clip

I’d recommend configuring the new tiles opacity as mentioned in the previous Create square step.
Export satellite images (tiled) ready for Terrain Builder
The following steps will need to be repeated 4 times in order to export your 4 quarters.
Menu – Raster → Extraction → Clip Raster by Mask Layer
Input layer - is the raster generated from the Align Raster step
Mask Layer - select each quarter, until you have extracted all 4
Change Output data type to ‘Byte’

Once your clipped file is saved, check the image dimensions are exactly half of those defined in the Create square step. In this example it would be 20480px
These 4 tiled sat images can then be brought together in Terrain builder using Layers.